Tag: cleaning hacks

  • Life Hacks for How to Remove Pesky Household Stains

    Life Hacks for How to Remove Pesky Household Stains

    No one is immune – stains from household products happen in every single household. We all have felt our heart stop when we notice a bit of coffee spilt on our couch or that drop of red wine fall onto our carpet.

    The good news is that with the proper techniques and products, you can effectively remove or minimize them. No one will be the wiser!

    Before we get into the common stain types and their hacks, we have three general tips for virtually every stain you come across.

    1. Act quickly. Stains are not like dishes… they do not need to soak before you act! The sooner you address a stain the easier it is to remove it.

    2. Blot, blot, blot. Do not rub the stain. Gently blot it with a clean cloth or paper towel to avoid spreading it further.

    3. Test first. Always test any stain removal method – even something simple like club soda – on an inconspicuous area to ensure it doesn’t damage the fabric.

    Okay, now that we’ve covered that, here are some of the most common stain types and cleaning hacks to remove them.


    Coffee and/or Tea Stains

    On clothing:

    1. Immediately blot the stain with a cloth dipped in cold water.

    2. Mix a solution of equal parts vinegar and water and gently dab the stain, then rinse.

    3. Blot until the stain is gone.

    On mugs:

    1. Sprinkle inside with baking soda and let sit for 10 minutes.

    2. Wash with soap and water.


    Grease and/or Oil Stains

    1. Place an absorbent material, such as cornstarch or baby powder, on the stain to soak up excess oil.

    2. Let it sit for at least 30 minutes, then brush it off.

    3. Next, apply dish soap directly to the stain.

    4. Let it sit for another 10 minutes, then launder on the warmest water level allowed for the fabric.


    Ink Stains

    1. Place the stained fabric on a clean paper towel.

    2. Blot the stain with rubbing alcohol, hairspray, or hand sanitizer until it transfers to the paper towel.

    3. Rinse, then launder.


    Red Wine Stains

    1. Blot the stain gently with a cloth.

    2. Next, sprinkle salt on it to absorb excess wine.

    3. Mix approximately three parts hydrogen peroxide to one part dish soap and apply to the stain.

    4. Let this sit for 20-60 minutes.

    5. Blot the stain again, then rinse in hot water.

    6. Once flushed out, launder as per the item’s label.
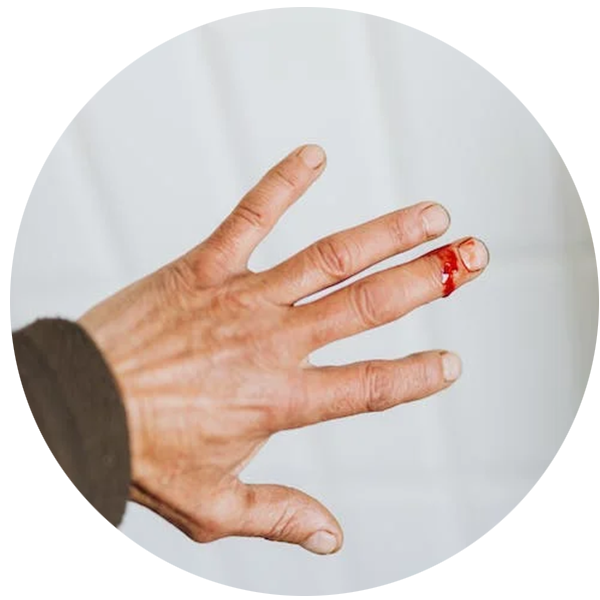
       

    Blood Stains

    1. Rinse the stain with cold water.

    2. Apply a solution of one part vinegar to two parts water to help lift the stain from the fabric.

    3. Let this sit for 10-20 minutes before you blot the stain.

    4. Rinse again, then launder.


    Grass Stains

    1. Apply a mixture of equal parts vinegar and water to the stain.

    2. Let this sit for 30 minutes.

    3. Scrub the material gently with an old toothbrush.

    4. Launder post scrubbing.


    Chocolate Stains

    1. Suck all the excess chocolate that you can! Chocolate should never go to waste! Just kidding… don’t do this.

    2. First, scrape off the excess chocolate using the edge of a spoon.

    3. Next, apply dish soap mixed with water directly onto the stain.

    4. Blot until the stain dissipates.

    5. Rinse the area, then launder.


    Tomato Sauce Stains

    1. Start by rinsing the stain with cold water.

    2. Apply a mixture of dish soap and hydrogen peroxide.

    3. Blot the stain, then rinse with water.

    4. Finally, put the item through the washing machine.


    Sweat Stains

    1. Soak the item in a solution of white vinegar and water.

    2. Remove the item, then apply a paste of baking soda, salt, and hydrogen peroxide to the affected area.

    3. Allow the mixture to rest for thirty minutes.

    4. When ready, scrub the stain with a toothbrush.

    5. Rinse in cold or lukewarm water.

    6. Wash on your regular cycle.


    Makeup Stains

    1. If clumped, remove as much as you can with the corner of a spoon.

    2. Apply dish soap directly to the stain.

    3. Gently blot the affected area.

    4. Rinse with cold or lukewarm water.

    5. Wash the item according to its instructions.


    Candle Wax Stains

    If the candle wax stain is not on the floor, do the following steps on an ironing board.

    1. Harden the wax with an ice cube.

    2. Use a dull knife or corner of a spoon to remove as much wax as possible.

    3. Place a brown paper bag or paper towel over the wax.

    4. Use a warm iron to melt any residual wax.

    5. Blot the remaining stain with rubbing alcohol.

    6. Rinse with warm water.


    Rust Stains

    1. Make a paste using lemon juice and salt.

    2. Apply the paste to the stain.

    3. Let it sit for a few hours, then rinse with water.

    4. Finally, launder the item as per its washing instructions.


    Before you dive in all eager to remove your stains, remember that results may vary based on the type of fabric and the severity of the stain. Always take the time to check care labels and follow those garment-specific instructions. If a stain is particularly stubborn or if you’re concerned about damaging the fabric, consider seeking professional help, such as from a dry cleaner for clothing and blankets or a carpet cleaner for your carpets or area rugs.

     Do you have a stain removal tip you’d like to share? We’d love to hear from you. Send us a note here.

  • Have a Happy Holiday with these Cleaning Hacks

    Have a Happy Holiday with these Cleaning Hacks

    Nothing can whip up stress and joy all at the same time quite like the holidays. The excitement about spending time with family and friends combating self-induced worry about everyone in your home, seeing just how clean you really live. Well, take it easy. You’re not alone! Use these tips, tricks, and holiday cleaning hacks so you can keep your home looking its best and your stress nice and low for this holiday season.


    Pre-Holiday Party

    Holiday Hack: Prep in Advance

    When we know what we’re working with, it becomes easier to find a solution. Before starting, create a list of all that you need to clean a few weeks before the holiday season start your cleaning – or book your pre-and/or post-party cleaner – to avoid any last-minute stress of having to do everything at once.

    Holiday Hack: Create a Cleaning Schedule

    From the list of to-dos, create a holiday cleaning schedule that outlines the specific tasks that need to be completed. Knowing what task you have to do and when, helps you plan your time while also breaking seemingly large to-dos down into tiny, manageable steps.

    Holiday Hack: Declutter First

    Surprisingly, now is a great time to declutter (or even purge) your space. Before putting up your holiday decorations, clear out any unnecessary items to create more space and make your holiday cleaning maintenance easier. While most of this will go into storage until after the holidays, if there is anything that you are ho-hum about, now’s the time to donate it.

    Holiday Hack: Focus on High-Traffic Areas

    There’s nothing like hosting a party that gives people eagle eyes for every spec of dirt in their home. Avoid the eagle eye stress knowing that your party will not go into every area of your home. Focus your cleaning efforts primarily on the high-traffic areas; areas that see most of the activity. These typically are the entryway, living room, and guest bathroom(s).

    Holiday Hack: Delegate Tasks

    Instead of taking on all the holiday cleaning yourself, get your family involved. After all, they say that the holidays are for spending time with family. Why not start by working together? Break your holiday cleaning to-do list down together and decide who will do what.

    Holiday Hack: Decorate Strategically

    To help you maintain a clean home throughout the holiday season, be strategic when placing your decorations around your home. As beautiful as they are, these decorations tend to be dust attractors. We recommend that you do not place these near vents or fans so you don’t have dust flying through the air (or going into your air filtration system).

    Holiday Hack: Take Breaks to Enjoy

    We can sometimes become so focused on cleaning perfection that we forget to take breaks and enjoy the festivities themselves. Take your well-deserved breaks and enjoy the festivities. If you forgot to schedule some fun family activity time (outings, cookie baking, holiday movies, etc.), now’s a great time to add them. Find the balance between cleaning for the holidays and relaxing to remove the stress of hosting a holiday party.


    Day of Holiday Party

     Holiday Hack: Protect Surfaces

    On your tables and other flat surfaces, use table runners and tablecloths. Put out coasters so people will use them, protecting your surfaces from spills and stains.

     Holiday Hack: Floor Mats and Rugs

    At the entrances to your party, place out floor mats and rugs to capture any dirt or debris from your guests’ shoes. If comfortable, ask people to remove their shoes and avoid having any unwarranted dirt makes its way further into your home.

     Holiday Hack: Quick Spot Cleaning

    If you’re not bringing in professionals to help clean the day before or day off, we recommend doing a deep clean at least the day before. On the day of, do a quick walk-through of your high-traffic areas and wipe down with a damp microfibre cloth, then dry with a dry cloth. For glasses, mirrors, or other shiny, reflective surfaces, give them some extra sparkle by polishing them with a specialized glass-cleaning cloth.

     Holiday Hack: Accessible Trash Bins

    Make it easy for your guests to help you keep your house clean during the party. Keep a trash bin accessible for people to easily throw away items when they’re finished. Begin the night with an empty bin and fresh garbage bag and change as needed throughout the night. For fun, why not dress the bin up with holiday decorations, making it a part of the scenery?

     Holiday Hack: Enlist Help

    It’s okay to ask for cleaning help before, during, and after a holiday party. No one said that you must do it all on your own. Invest in a party cleaning package so you can focus on the party details that matter most – spending time with people.


     After the Holidays

     Holiday Hack: Post-Holiday Cleanup Plan

    Just as setting up your decorations is a great time to declutter, taking down and putting away your decorations is a great time to deep-clean your home. We also recommend having a specific date you want to have your decorations down. This gives you time to plan what needs to be put away by when. One common practice many people do is to have them down by December 31, so they can start the New Year fresh.


    The holidays are about spending time with loved ones and creating cherished memories, not about stressing about cleaning. Use these cleaning hacks to keep your holiday entertaining joyful and joy-filled!

     For more tips and tricks for planning your holiday party, click here[1] .

    https://www.cleanclubcalgary.com/blog/your-party-planning-checklist

  • 9 Simple Bathroom Hacks to Keep Your Bathroom Sparkle

    9 Simple Bathroom Hacks to Keep Your Bathroom Sparkle

    The bathroom can often be our haven from the busyness of the day. The one place where we can get mere minutes of some much-needed alone time.

    But, when it becomes overrun with dirty mirrors from toothpaste splashes, rings appear in the tub and sink, and you find yourself in a hover over the toilet seat for fear of what’s on it, your haven can quickly feel like a horror movie!

    Below are nine easy bathroom tricks to help you keep your bathroom a sanctuary of calm, not a space to fear.


    Hack: Hardwater Removal

    In Calgary, hard water builds up very quickly. When we first clean a new client’s home, this is often one of the main things we find in the bathroom that we use some extra elbow grease to remove. However, once it’s cleaned properly (and regularly), removing any hard water spots is a breeze. All that’s needed is a bit of dish soap and vinegar on a wet SOS pad to clean water stains – especially those on glass shower doors. 

    Once you’ve removed the hard water stains, simply wipe down the surface with a damp microfibre cloth, then dry with a dry microfibre cloth.

    Items needed:

    • SOS pad

    • Dish soap

    • Vinegar

    • Water

    • Two microfibre cloths


     Hack: Sparkling Faucets and Area

    It can be common to have a brown or pink ring build up around your faucet. Because this often looks daunting, many people tend to use a lot of product to remove the ring. In reality, all that’s needed is a little dish soap and possibly a blade. The blade – similar to a blade you would use on a flat-top glass stove – will not damage your faucet or counter. Rather, it removes hard water build-up in tight spaces and flat surfaces. One note of warning – be sure to use the blade on the counter only and not the faucet itself.

    For the faucet, simply use a bit of dish soap and water to remove any water stains. Then, polish it up with a glass cleaning cloth for extra sparkle.

    Items needed:

    • Dish soap

    • Small blade

    • Glass cleaning cloth


     Hack: Toilet Tutorial

    Like it or not, this is the most used seat in the house. At Clean Club Calgary, we recommend that this home throne should be cleaned at a minimum of once per week. The good news is you don’t need fancy cleaning products to make it shine. All you need is a toilet brush, a bucket of clean, hot water with a dollop of dish soap and a splash of bleach, and two microfibre cloths – one damp and one dry. If you prefer, we recommend you wear rubber gloves here, especially if you add bleach to your water/soap solution. For full details of a deep cleaning of your toilet, read here.

    For maintenance rather than a deep clean, a simple swish of the cleaning solution with your toilet brush in the bowl (including under the lip) and a wipe down of the exterior with the damp and dry cloths will suffice.

    Items needed:

    • Toilet brush

    • Bucket of clean, hot water

    • Dish soap and bleach

    • Two microfibre cloths


    Hack: Bathtubs and Showers

    The bathtub and shower often see a build-up of soap scum due to, well, soap and shampoo and conditioner. When there is a build-up of soap scum, we need to test if the dish soap will be enough on its own to remove it. The reason is that soap scum build-up is very greasy and oily and the best product to break it down is, funnily enough, dish soap. If it doesn’t work, then some good ol’ fashion elbow grease and an SOS pad add the little extra oomph needed to remove the scum.

    Items needed:

    • Dish soap

    • Water

    • SOS pad


     Hack: Tiles and Grout Goodness

    Grout can be the bane of your existence when trying to relax in a quiet bubble bath. Seeing once-white grout with a tint of grey can turn relaxation into an all-consuming thought. To avoid this unsightly distraction while you’re trying to find your peace, we recommend using a toothbrush to scrub the grout. Before you scrub, though, pre-treat it with either dish soap or Kitchen and Bath CRL. CRL tends to require dwell time to activate it. The specific dwell time is indicated on the label of the product. Once it’s pretreated, scrub with your brush, and rinse with water.

    Items needed:

    • Toothbrush (unused…not your own toothbrush!)

    • Dish soap

    • Kitchen and Bath CLR

    • Water


    Hack: Light Fixtures and Vents

    We can sometimes forget about our lights and vents, particularly vents that are on the ceiling. From time to time, take the light cover off and remove any dead bugs and dirt that have landed there, then simply wash the fixture with dish soap and water. Dry it with a microfibre cloth and put it back. If you want to give your light fixture a little extra shine, we recommend polishing it with one of our glass cleaning cloths.

    For vents, if able, remove the vent and vacuum off any dust that became stuck in it. Once you’ve removed all dust particles (sometimes big clumps), wash with dish soap and water, dry with a microfiber cloth, and then put it back.

    Items needed:

    • Dish soap

    • Water

    • Vacuum

    • Microfibre cloth


     Hack: Baseboards Below

    Baseboards can collect dust and dirt, along with random bathroom splashes. Before you wipe them down, simply give them a quick vacuum to remove any dirt. If you don’t do this, then you’ll spread the dirt when wiping it “clean” with a cloth.

    Once you’ve vacuumed, wipe the baseboards down with a damp cloth. If they are dirty – simply use water and dish soap to remove any spots, then dry them with a dry microfibre cloth. Note that baseboards typically only need to be cleaned once per month.

    Items needed:

    • Vacuum (or duster)

    • Dish soap

    • Water

    • Two microfibre cloths


    Hack: Bathroom Door and Cabinet Fronts

    Much like other aspects of the bathroom, the door and cabinets tend to collect dust and grease build-up. While these don’t need to be cleaned every week, we do recommend once a month. All you need is a bit of dish soap in water on a microfibre cloth, then wipe down the door and cabinet fronts, removing any spots. Then, dry with another microfibre cloth.

    Items needed:

    • Dish soap

    • Water

    • Two microfibre cloths 

    The best way to mop your floors

     Hack: Floors that Shine

    Floors quickly become dirty from bath splashes, toilet splashes, sink splashes, all the splashes! To avoid having perpetually sticky, splashy floors, mopping the floor once a week with soap and water is your best bet. The best type of mop to use is one that you can attach a microfibre cloth to, not the type that you insert into a pail and strain the water out of the mop head.

    Note that different flooring materials can require different products. Depending on your bathroom floor, you may require different materials – which can be found in this post.

    Items needed:

    • Bucket of clean, hot water

    • Dish soap

    • Mop with velcro mop head

    • Microfibre cloth

    Bonus Hack: Counter Space and Storage

    There is nothing we love more than storage baskets under the sink. As much as having all our products out on the counter lets us know what we have, they add clutter and increase cleaning time because we have to remove all the products and then put them back when done. All you need to do is purchase a storage basket – the dollar store has excellent ones – put your items in the basket and hide the basket under the sink, pulling it out when you need it. This will help to keep your counters free of clutter.

    Items needed:

    • Storage basket

    These quick cleaning hacks for your bathroom will help to keep your bathroom a place for you to enjoy, not fear!


    If you’re looking for support in deep cleaning your bathroom so you can get started with your easy maintenance, simply connect with us for a quote to take care of the really tough scum.

  • 15 Sparkling Cleaning Hacks for Busy Families

    15 Sparkling Cleaning Hacks for Busy Families

    Imagine waking up on Saturday.

    You’ve got your list of to-dos for the day – getting the kids to activities, going to the grocery store, checking your errands off your list as you go from place to place.

    Then, you come home and realize…you still have the house to clean.

    It’s THE WORST!

    But what if you could come home and realize that your home is already clean thanks to a few handy cleaning hacks you and your family have already mastered? What if coming home so you could just relax if only for a few hours, was a possibility in your busy world?

    Keeping your home clean and organized can be a great bonding activity that involves your whole family, making the cleaning process more manageable and, dare we say it, enjoyable! Below are 15 cleaning hacks so you and your family can have more time for each other during the busyness of your everyday living.

    woman writing in journal

    Set Clear Expectations

    First thing’s first – make sure everyone is on the same page when it comes to what’s expected of a clean house. It’s easier to be consistent in your cleaning when everyone knows what is expected of them. Have a family meeting to discuss who’s responsible for what cleaning, setting clear expectations of what “clean” means. For example, if someone is responsible for doing the dishes, does this mean simply washing them and putting them in the drying rack OR washing them, drying them, and then putting them back in the cupboards?


    clean and organized home with nice view

    Create a Cleaning Schedule

    Building cleaning habits is the same as building any other habit. It’s easier when there’s a schedule and you know what needs to be done on what day. Develop a weekly cleaning schedule that assigns specific tasks to different family members on different days. For instance, Tuesdays could be dedicated to stripping the beds and putting on new sheets, and Wednesdays could be laundry day for the dirty sheets.

    We recommend building a weekly schedule for items that should be cleaned each week, such as the bathrooms, kitchens, and other well-used areas (e.g., family rooms). We also recommend setting a monthly and six-month schedule for items that don’t need to be cleaned as regularly. Think once a month vacuuming of the entire house, and Spring/Fall cleaning.


    Use Chore Charts

    To support your cleaning schedule, create a chore chart to help visualize what chores need to be completed when and by whom. This is a great way to track what tasks need to be completed on what day and what tasks have been completed, while also providing a sense of accomplishment when you and your family can check off a completed chore.

    You can DOWNLOAD a free copy of our Chore Champion Checklist here.

    family playing board game together

    Make It a Game

    Who can forget how Mary Poppins turned cleaning a room into a treat with the unforgettable song, A Spoonful of Sugar? It turned a traditionally “boring” task into a game. Turn your cleaning into family fun by setting a timer to see how quickly everyone can complete their tasks. To make it even more fun, offer small rewards or incentives for motivation. Family game night just got a whole lot more interesting.

    The real winner? You are since you’re now living it up in a freshly clean home!

    child helping clean dishes at sink

    Remember: Many Hands Make Light Work

    When it comes to housework, learn to divide and conquer. Split larger tasks into smaller ones and have family members work in pairs or groups to get things done faster. Plus, it’s always more fun when doing a chore alongside someone instead of doing it alone.

    young child doing laundry

    Assign Age-Appropriate Tasks

    At Clean Club Calgary, we believe that teaching children to clean is really preparing them for life. Many of our clients specifically ask us to not clean their kids’ rooms because this is their responsibility. This includes your younger children too. Assign tasks that are suitable for each family member’s age and abilities. Younger children can handle simpler tasks like picking up toys, while older kids can help with vacuuming or dusting.

    For more child-friendly chores, visit this post dedicated to Children and Chores.

    man singing into broom while cleaning

    Listen to Music or Audiobooks to Pump Up Your Energy

    Personally, I love to put my headphones on and play some music while I groove with some tunes. Dusting is no longer simply dusting. It’s dusting with a bit of dancing attitude! Other times, I listen to an audiobook so I can stay on top of my reading/learning. The key here is that listening to something while cleaning makes the process more enjoyable.

    black and white cleaning tools

    Provide the Right Tools

    Cleaning is a whole lot easier to do when everyone has access to the appropriate cleaning supplies and tools needed to complete their assigned tasks. A few of our favourite cleaning tools that we recommend can be found here.

    cleaning products in holder

    Family Cleaning Kit

    Just as we recommend that you have the right cleaning tools available, we recommend that you create a portable cleaning kit with supplies, such as wipes, a handheld vacuum, and microfiber cloths so it’s easy to bring these items in one trip TO the areas that need to be cleaned. This makes it easier to store and find your cleaning supplies so your family’s not frantically searching the house for the right cleaning item.

    boxes on floor filled with decluttered clothes

    Regularly Declutter

    Clutter can so easily get out of control. Not only can this become an eyesore, but it can also impact our mental health without us even knowing it. Simply seeing clutter pile up can quickly turn into overwhelm. So, to not let clutter take over your life, set aside time each month to declutter and organize your communal spaces. Encourage everyone to pitch in and donate or discard items that are no longer used and/or needed. To implement a few easy “how tos” for decluttering, check out this blog on how to reduce clutter.

    children cleaning toys on floor

    Clean as You Go

    Rather than waiting for “cleaning time” to happen, encourage family members to clean up after themselves as they go. For example, instead of simply putting their dish in the sink when done, have them rinse it and put it directly in the dishwasher. For children, encourage them to put away a toy that they’ve finished playing with before they get a new one to play with. For many with glass shower doors, keep a squeegee in the shower so that when you turn off the water, do a quick squeegee of the doors to remove water droplets, avoiding water stains. This helps when your deeper shower cleaning happens because you don’t have to work so hard to wipe off watermarks.

    young girl cleaning toyroom

    Zone Cleaning

    To keep cleaning fresh and fun, assign specific zones of the house to different family members to clean thoroughly. Rotate the zones regularly so everyone feels invested in keeping the whole house clean.

    mother showing daughter how to fold laundry

    Lead By Example

    Many of us learn our cleaning habits and our cleaning attitudes from our parents. If we want a clean house where our children are also contributing, then it’s up to us to lead the way, demonstrating a positive attitude toward cleaning and actively participating in household tasks.

    husband and wife cleaning living room

    Plan for Busy Days

    Some days are simply busier than others – there are more activities, more chores, more places to be, more errands to run, more, more, more. Fortunately, many of these we can plan for thanks to schedules. When these days (sometimes weeks) happen, focus on quick, high-impact tasks that can make a noticeable difference in your home’s cleanliness. A few of these tasks that we find take minimal effort, but make a huge difference can be found here, here, and, for those ultra-busy weeks, here.

    man and child high fiving

    Celebrate Achievements

    Cleaning can feel like a thankless, never-ending chore. Take time to acknowledge and celebrate your family’s collective efforts and accomplishments in maintaining a clean and organized home. Perhaps it’s a special night out for dinner. Perhaps it’s finally investing in that new vacuum you’ve all been eyeing that will FINALLY suck up all the fur and hair in your home. Each family celebrates their own unique way – find out what’s yours.

    When we can make cleaning a family habit that’s built into our schedule, we will find more time for each other, time to do the things that matter, and, yes, even time to relax. The goal is to create a clean and comfortable home environment while also fostering a sense of teamwork and responsibility within the family. Adapt these life hacks to suit your family’s needs, dynamics, and preferences so you can start enjoying your home again.

  • 7 Ways to Professionally Clean Your House Like the Pros

    7 Ways to Professionally Clean Your House Like the Pros

    Disney’s Classic, Cinderella, gave us all certain expectations about how cleaning happens. It involves singing, friendly mice, and helpful birds. We’ve since learned that we were way off base.

     Not a single member of Clean Club Calgary has yet to see one mouse, one bird, one critter helps us with cleaning – even when we sing a lovely little song. Personally, we believe it’s because these creatures merely have a misunderstanding of what cleaning a house entails.

     So, if the neighbourhood chickadees aren’t yet sweeping your home, we thought it best to provide some insight into how we professionally clean a house just in case you need to clean…without the help that Cinderella had.


     1. Your Home; Your Cleaning Schedule

    Some families complete chores one day a week. Others, complete smaller chores each day. The best schedule for your home is the one that works best for you.

     What we do recommend at Clean Club Calgary is that if you have a busy household, tidy up every day or two so the build-up of “stuff” doesn’t start to overwhelm you. For example, do not leave dirty dishes and food on the kitchen counters, especially if you have pets. Pets will jump up with ease if there’s any hint of food on the counter. I personally have seen a dog eating a full birthday cake, knife and all, without even a second thought! Don’t worry, they survived.


    2. Bust the Bathroom Fear.

    Bathrooms are not as challenging as many of us think. It’s knowing what techniques and tools are available to you that make it easier. For instance, if you have hard water and glass shower doors (not the best combination if you ask me) make sure to take 10-seconds after each shower and squeegee the glass. This helps to reduce/prevent scum and hard water stains on the shower. Our personal method for cleaning this type of surface is starting at the top corner and working your way down to the bottom right. Go through and wipe down surfaces. If you stay on top of this, a scrub down of the surface will not be required each time you clean, but a simple wipe down. Another bathroom buster that reduces the heavy bathroom cleaning lifting is ensuring you clean your toilet the right way. Yes – there’s a right way! Here’s an article that gives you the step-by-step details to sparkling up that toilet (and freshening your whole bathroom) with ease!


    3. Let the Bedsheets Breath.

    Clean bedding should not be an afterthought when it comes to cleaning. There are often hidden, itty bitty dust mites, sweat, dead skin cells, hair, and fur (for pet families) and sometimes even bugs. A few things you can do to reduce these yucks are:

    1. Make your bed every day,

    2. Wash your bedding weekly and at least every second week.

    Super simple! This is the first place I typically recommend people start with cleaning their house. Once the bedsheets are changed, dusting will be a breeze  too, as you shook all the dust around and it can now be wiped with ease. 😊


    4. Kitchen Nightmares Become Dreams.

    Our kitchen can seem overwhelming to clean at first. There are all these corners, random spills and splotches, and food burnt onto the stove that seems to have made its home there. This nightmarish feeling doesn’t have to be. Begin building “every day tidying up” into your schedule (5-10 mins/day max). Since you clean or wipe down your kitchen after each meal, the more in-depth cleaning will be easier later. There are, of course, a few cleaning hacks we have to help along the way:

    1. Microfibre cloths are the best to wipe down surfaces, both when wet and dry.

    2. Soap and water are all you really need. Although, if you want a little extra kick, we recommend Bar Keeper’s Friend.

    3. Make your stainless steel appliances, glasses, and faucets sparkle with an amazing cleaning cloth.

    4. Remove pet and kid prints from cabinets with a damp, soapy microfiber cloth. Wipe down the cabinets with the damp cloth, then use a dry microfiber cloth to dry and polish up the cabinets again.


    5. A Dust is an Absolute Must!

    A quick once around the house with your dusting materials is all you need once a week. If you want to do a deeper dusting, we recommend dusting the baseboards and vacuuming the vents. Realize that dusting can also become quite cumbersome, particularly if you have lots of knick-knacks and other items that collect dust. However, dusting is one of the things that will immediately improve the air quality of your home, along with how “fresh” a space feels. To learn more about the ins and outs of how to properly dust, read this post on dusting tools and techniques .


    6. Vroom Vroom Vacuum.

    Our floors have so much more on them than we can ever imagine. Whether wood, cork, tile, or carpet, there’s dirt, dust mites, grit, and so many other hidden ickies that it’s best not to mention them further. Vacuuming is always required if you want a clean home. If you have pets, we recommend vacuuming a minimum of once a week. Every couple of months run the vacuum along the edges of your carpet as dust just loves it in these groves. And don’t forget under the bed! These areas are the biggest dust and dirt collectors. If you find yourself regularly waking up all stuffy and sneezy, ask yourself when the last time you vacuumed under the best was. To learn the ins and outs of vacuuming and on different floor types, read this post .


    7. Mopping the Good Ol’ Way.

    Mopping is not fancy. All it takes is a bucket of water with a mop and microfibre cloth. A good wash and wipe down of the floor is always the best. If you really want, you can add some essential oils to the soap and water to give a little extra zest to the smell. Start in one corner and work your way to the other. Take our advice though and be careful not to mop yourself into a corner where you can’t move until the floor is dry. It gets tricky trying to leap over the wet floor.


    With each of these steps for professional cleaning, we created this simple cleaning tool list, outlining the top 10 cleaning items you need to get your home all sparkly clean . Have these tools, follow the above insights, and your home will look as though the professional did it!

    Of course, there is an eighth way to clean your house, especially if the above simply leaves you saying, “no thank you!” Hire a professional cleaning company. We’d be happy to help 😉. Request a quote today.