Tag: residential cleaning

  • Simplified Prep: Get Ready for a Refreshing Residential Deep Clean

    Simplified Prep: Get Ready for a Refreshing Residential Deep Clean

    There’s a myth about deep cleaning your home that we come up against time and again. The myth is that deep cleaning is an extensive time and cost commitment. However, this is often far from the truth, particularly when you understand how to prepare for a professional deep clean, along with what you can do to customize your service for your needs and budget.

    Let’s dive into our top three recommendations that you can do to prepare your home for a deep clean with confidence and a clear plan of attack.


    Preparation Tip 1: Declutter for Efficiency

    Before your professional cleaners arrive to deep clean your home, take the time to declutter the rooms they’ll be deep cleaning. Clearing surfaces, organizing belongings, pulling out furniture – if required – and tidying up make the deep cleaning process more efficient. Remember, the easier it is to navigate your home, the more effective and less time-consuming the deep cleaning will be. If you want, take it a step further, make three piles, placing your items in them: one to keep, one to donate, and one to toss.

    Be strict about getting rid of things that are just taking up space. This not only makes cleaning quicker but also gives your place a neater, more organized vibe. Keep it real, keep it simple, and set the stage for a no-nonsense deep clean that leaves your home looking sharp and clutter-free. To learn more, visit our article on how to reduce clutter here.


    Preparation Tip 2: Create a Cleaning Checklist for Clarity

    To facilitate a smooth deep cleaning process, create a cleaning checklist for the cleaners. Clearly outline any specific requests or areas that need special attention. This ensures that the cleaning team addresses your unique concerns and focuses on the aspects that matter most to you. Some items that we often see on these checklists from our clients include dusting, mopping, wiping down the inside kitchen cabinets (upon request only), etc.

    If you’re looking for an example of a cleaning checklist, visit this article on Spring Cleaning, scroll down to the bottom, and download our Spring Cleaning checklist. 


    Preparation Tip 3: Provide Clear Instructions for Special Cleaning Requests

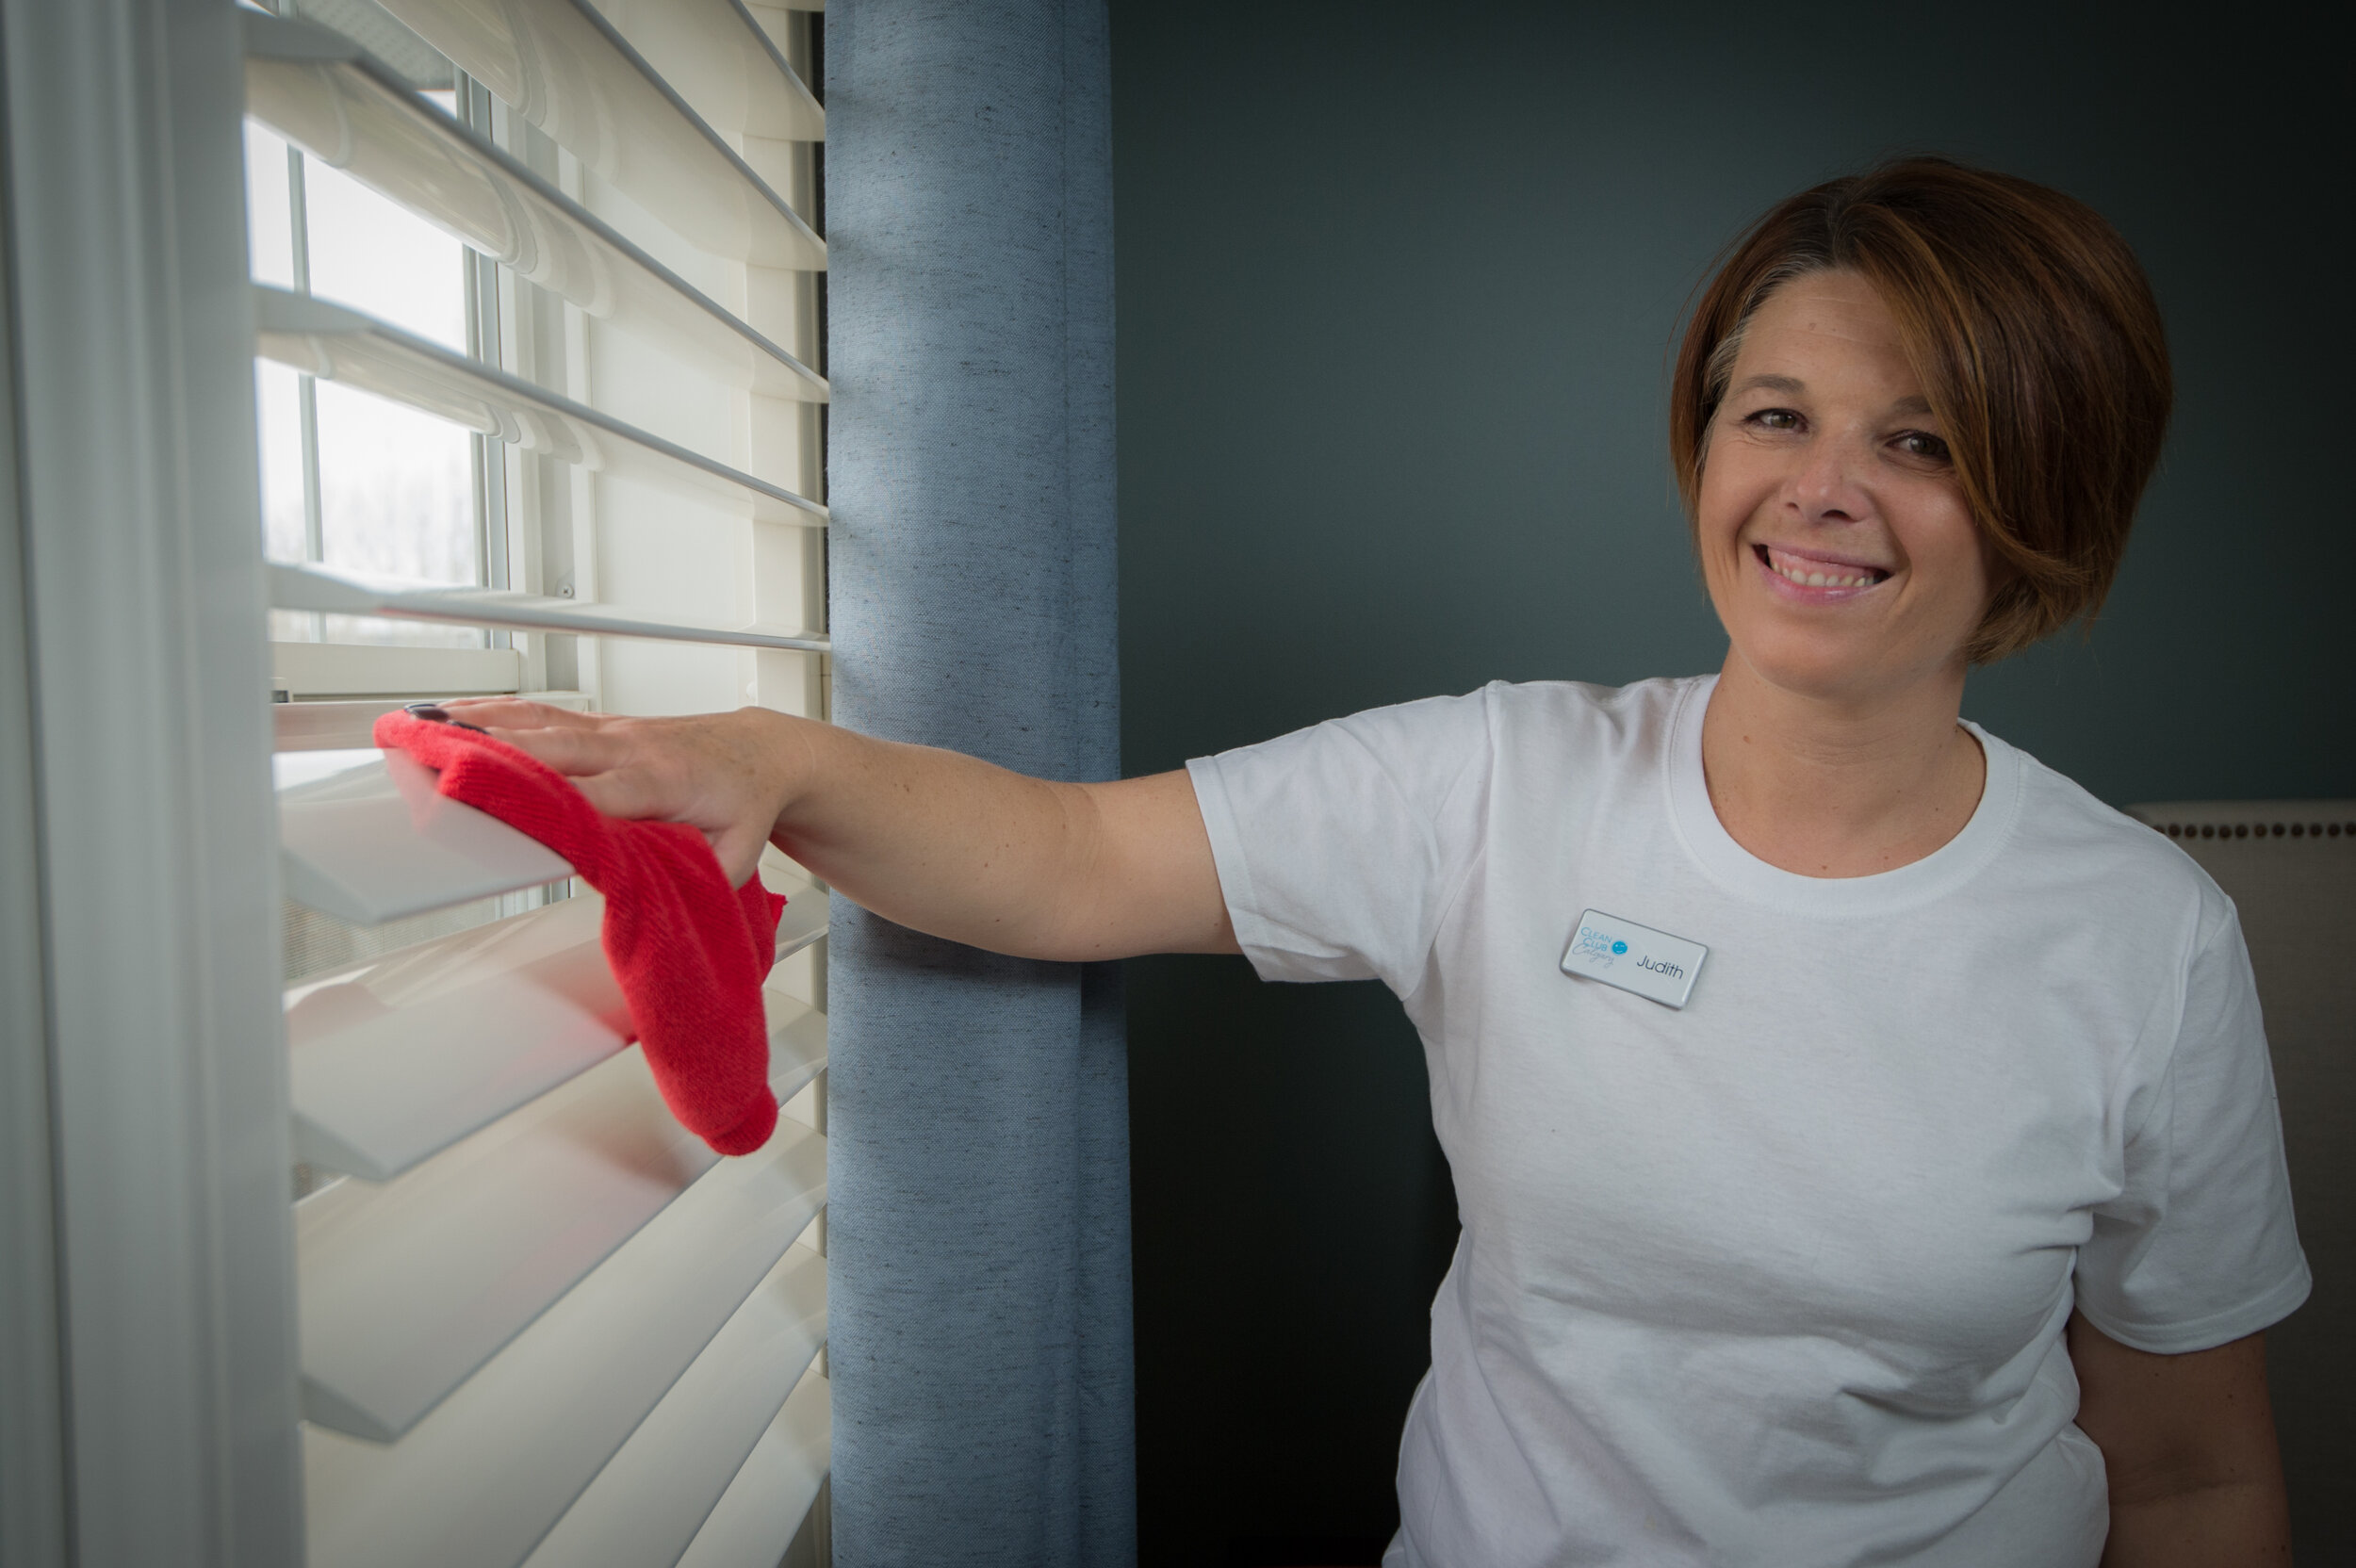
    At Clean Club Calgary, we understand that every home is unique, and our goal is to tailor our deep cleaning services to your specific needs. To ensure your expectations are met, we recommend that you provide clear instructions for any special cleaning requests you may have. Whether it’s highlighting delicate surfaces, requesting specific cleaning products, or detailing areas that require extra attention, communicating these details beforehand helps our team address your concerns effectively. A comprehensive set of instructions allows us to customize our approach so your deep cleaning experience aligns perfectly with your preferences.


    Common Deep Cleaning FAQs

    Not all deep cleaning appointments are the same. The following frequently asked questions will give you deeper insight into how you can make the most of your deep cleaning experience.

    Q: We have pesky stains that we don’t know how to remove. Can you help with this?

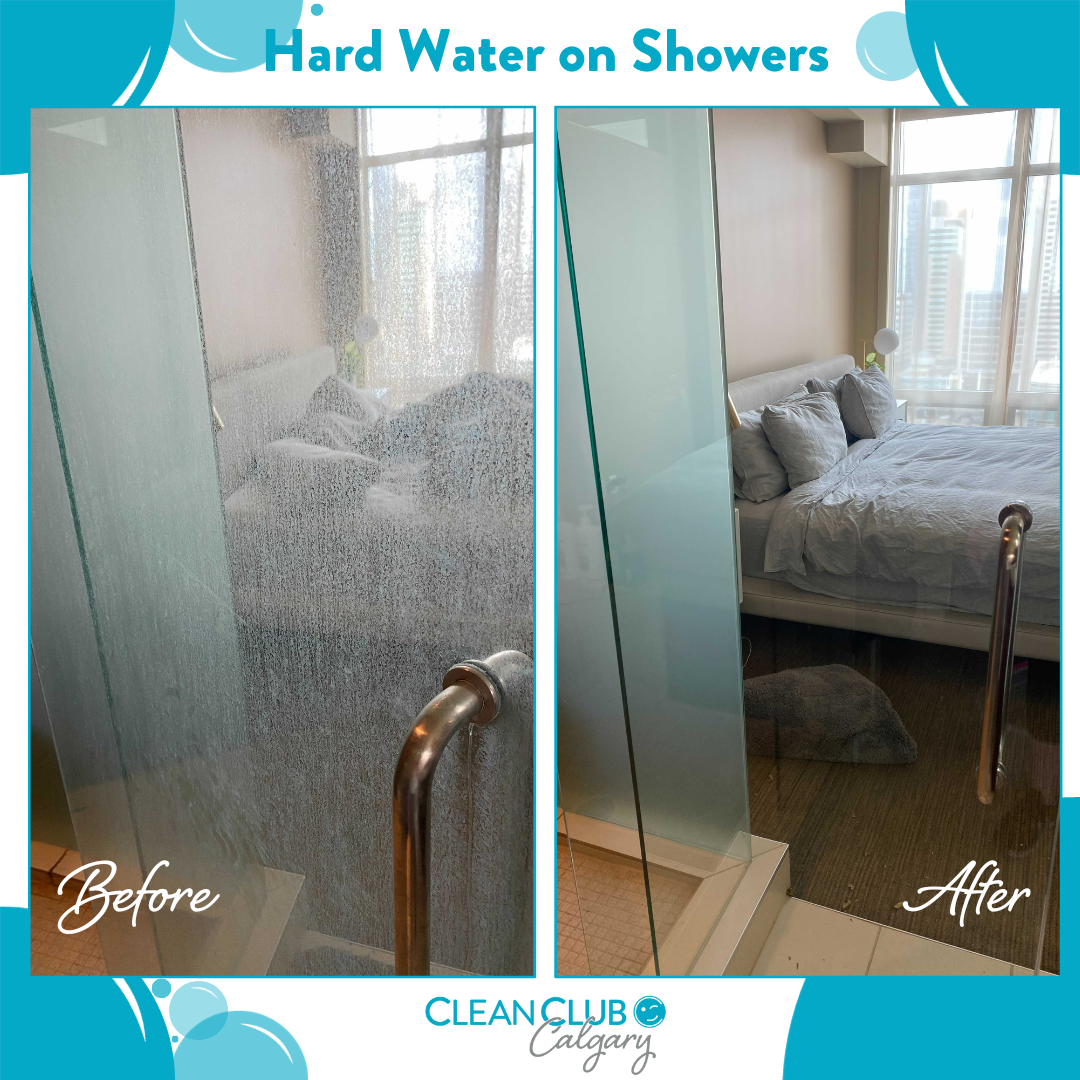
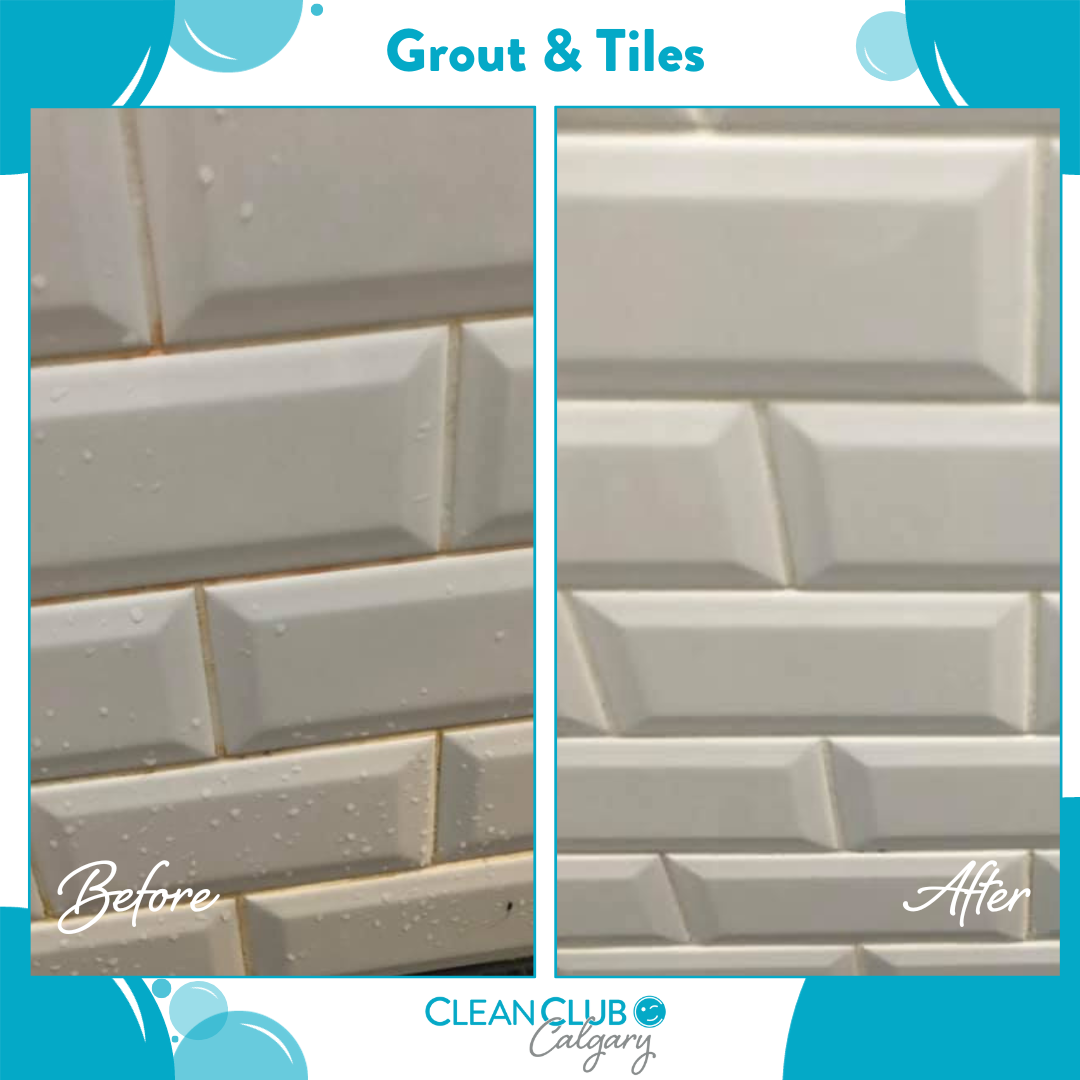
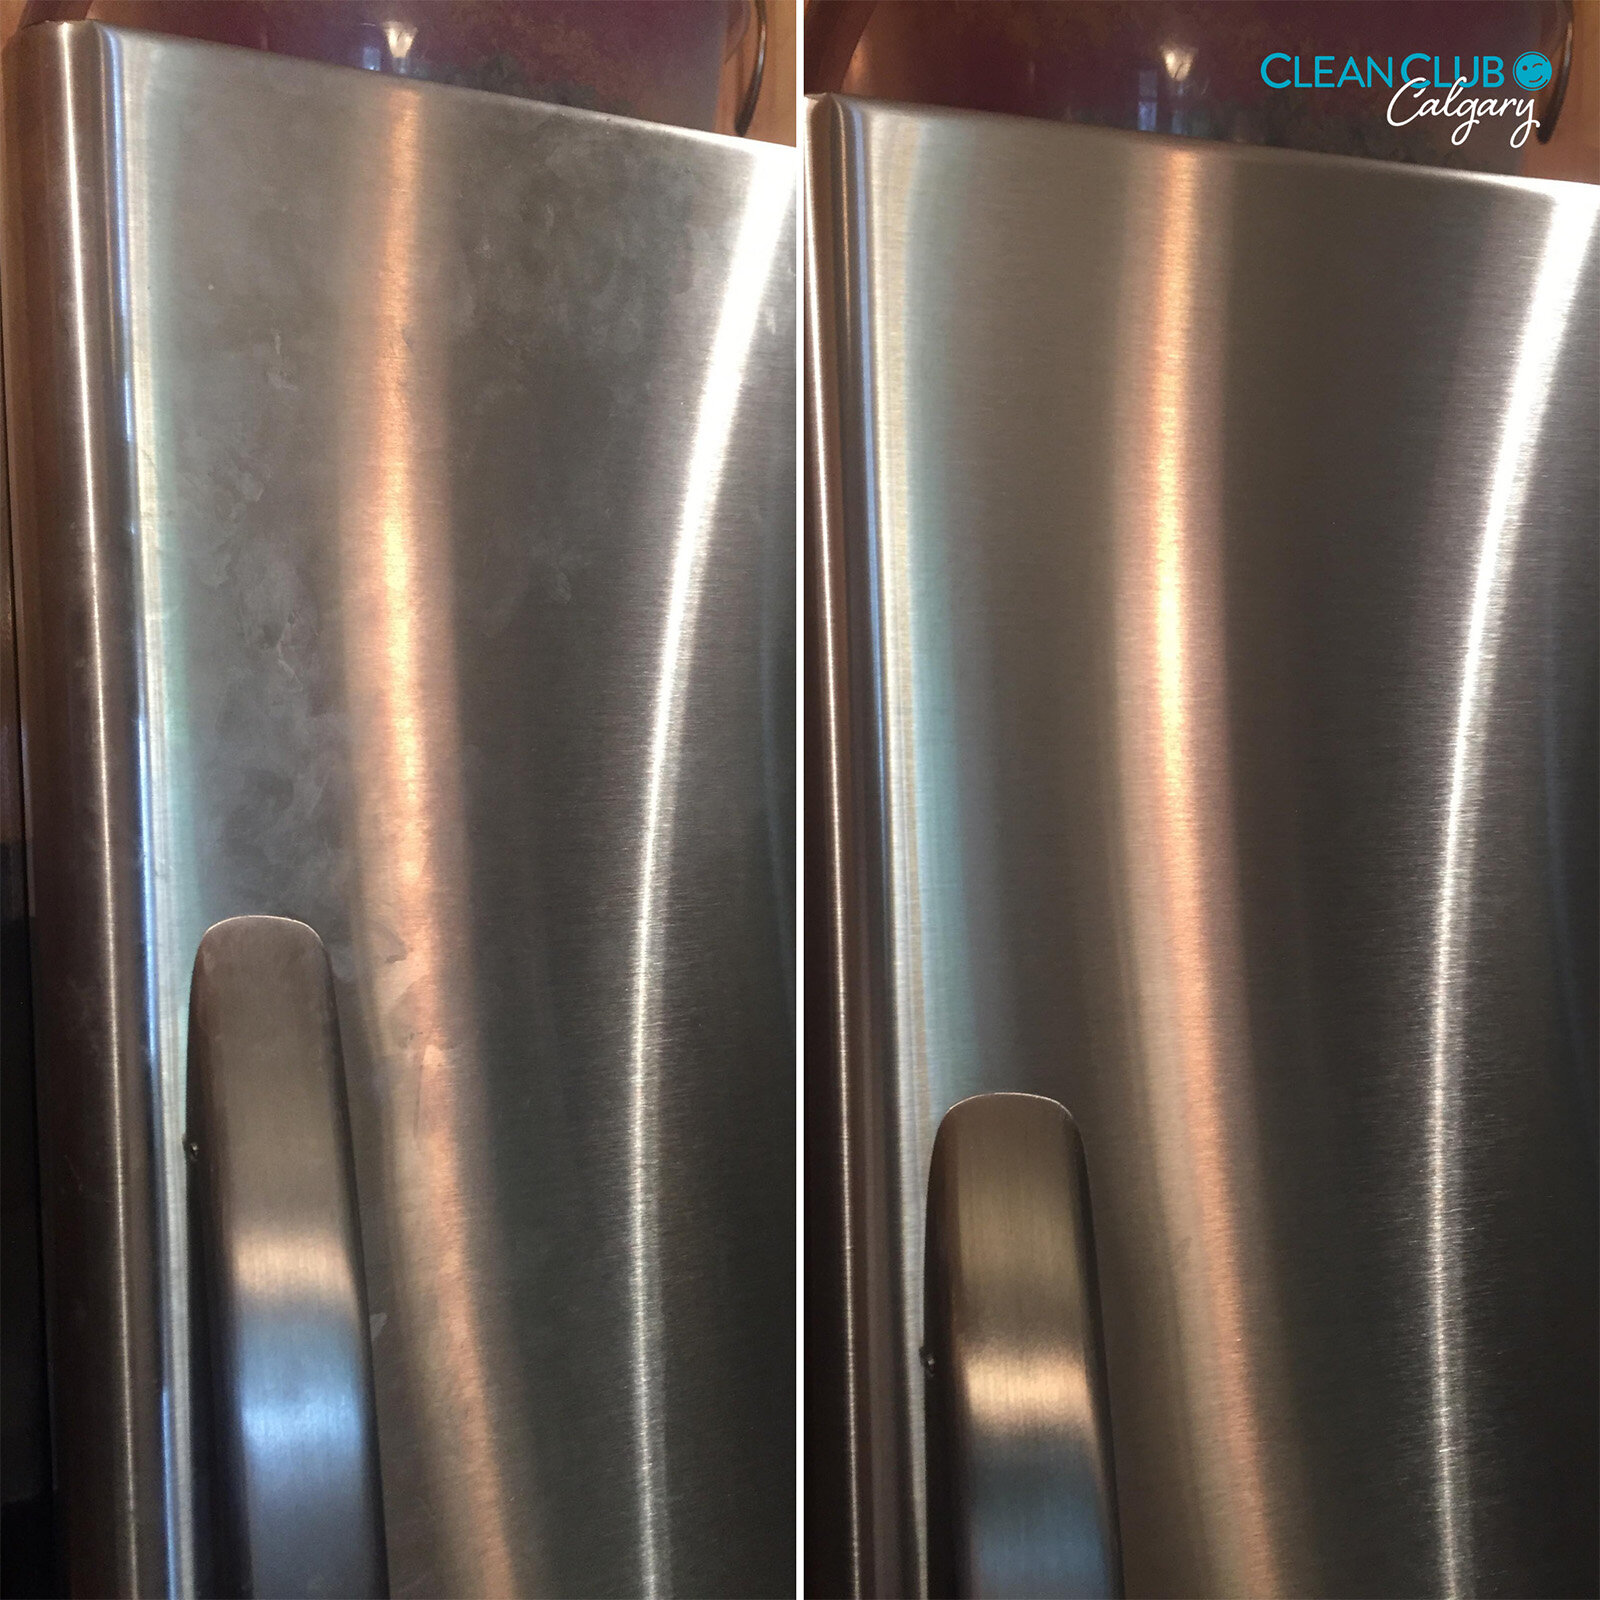
    A: We do our best to remove those pesky common household stains when they are included on the checklist. However, there are often several factors that come into play when it comes to stain removal. We recommend that for common stains, review this article on how to remove common types of stains so that you can remove the stain itself. This way, the stain itself doesn’t set while you’re waiting for your regular or deep cleaning session.

    Q: Do you customize your deep cleaning services?

    A: Many homeowners shy away from deep cleaning, assuming it involves cleaning the entire house. At Clean Club Calgary, our deep cleaning services are fully customizable, allowing you to choose specific areas that need attention. Whether it’s your bathrooms, the main floor, or a combination of spaces, we tailor our services to fit your requirements and budget. This flexibility makes deep cleaning accessible and affordable, dispelling the notion that it’s an extravagant undertaking.

    Q: What’s the difference between a regular, routine cleaning and a deep cleaning?

    A: It’s important to recognize that deep cleaning and routine cleaning are distinct processes with different time requirements. The more tasks involved, the more time it adds up. Be realistic about your expectations for subsequent cleanings after a deep clean as regular maintenance is key to preserving the results and ensuring your home remains a clean and healthy environment. To learn more about the details of the differences, visit this article on the differences

    Q: How often should I schedule a deep clean?

    A: The frequency of deep cleaning depends on factors like lifestyle, pets, and personal preferences. On average, we recommend a deep clean every 3 – 6 months. To help determine what cleaning schedule works best with your calendar, refer to this guide on different considerations for cleaning schedules.

    Q: Do I need to be present during a deep cleaning session?

    A: Nope. We have many clients who trust us to come and complete our cleaning services. However, to do this, they provide a detailed list of what they need cleaned, they move their valuables and other furniture, if required, so we can access certain areas, and so forth. Other clients prefer to be present because this allows them to directly communicate specific requests and preferences to the cleaning team. This is all about your personal cleaning preference.


    Preparing your home for a deep cleaning doesn’t have to be a daunting task. Clean Club Calgary’s customizable services, combined with effective decluttering and clear communication, ensure a seamless and personalized experience…and a deeply clean home! Book your deep cleaning session right here.

  • 9 Simple Bathroom Hacks to Keep Your Bathroom Sparkle

    9 Simple Bathroom Hacks to Keep Your Bathroom Sparkle

    The bathroom can often be our haven from the busyness of the day. The one place where we can get mere minutes of some much-needed alone time.

    But, when it becomes overrun with dirty mirrors from toothpaste splashes, rings appear in the tub and sink, and you find yourself in a hover over the toilet seat for fear of what’s on it, your haven can quickly feel like a horror movie!

    Below are nine easy bathroom tricks to help you keep your bathroom a sanctuary of calm, not a space to fear.


    Hack: Hardwater Removal

    In Calgary, hard water builds up very quickly. When we first clean a new client’s home, this is often one of the main things we find in the bathroom that we use some extra elbow grease to remove. However, once it’s cleaned properly (and regularly), removing any hard water spots is a breeze. All that’s needed is a bit of dish soap and vinegar on a wet SOS pad to clean water stains – especially those on glass shower doors. 

    Once you’ve removed the hard water stains, simply wipe down the surface with a damp microfibre cloth, then dry with a dry microfibre cloth.

    Items needed:

    • SOS pad

    • Dish soap

    • Vinegar

    • Water

    • Two microfibre cloths


     Hack: Sparkling Faucets and Area

    It can be common to have a brown or pink ring build up around your faucet. Because this often looks daunting, many people tend to use a lot of product to remove the ring. In reality, all that’s needed is a little dish soap and possibly a blade. The blade – similar to a blade you would use on a flat-top glass stove – will not damage your faucet or counter. Rather, it removes hard water build-up in tight spaces and flat surfaces. One note of warning – be sure to use the blade on the counter only and not the faucet itself.

    For the faucet, simply use a bit of dish soap and water to remove any water stains. Then, polish it up with a glass cleaning cloth for extra sparkle.

    Items needed:

    • Dish soap

    • Small blade

    • Glass cleaning cloth


     Hack: Toilet Tutorial

    Like it or not, this is the most used seat in the house. At Clean Club Calgary, we recommend that this home throne should be cleaned at a minimum of once per week. The good news is you don’t need fancy cleaning products to make it shine. All you need is a toilet brush, a bucket of clean, hot water with a dollop of dish soap and a splash of bleach, and two microfibre cloths – one damp and one dry. If you prefer, we recommend you wear rubber gloves here, especially if you add bleach to your water/soap solution. For full details of a deep cleaning of your toilet, read here.

    For maintenance rather than a deep clean, a simple swish of the cleaning solution with your toilet brush in the bowl (including under the lip) and a wipe down of the exterior with the damp and dry cloths will suffice.

    Items needed:

    • Toilet brush

    • Bucket of clean, hot water

    • Dish soap and bleach

    • Two microfibre cloths


    Hack: Bathtubs and Showers

    The bathtub and shower often see a build-up of soap scum due to, well, soap and shampoo and conditioner. When there is a build-up of soap scum, we need to test if the dish soap will be enough on its own to remove it. The reason is that soap scum build-up is very greasy and oily and the best product to break it down is, funnily enough, dish soap. If it doesn’t work, then some good ol’ fashion elbow grease and an SOS pad add the little extra oomph needed to remove the scum.

    Items needed:

    • Dish soap

    • Water

    • SOS pad


     Hack: Tiles and Grout Goodness

    Grout can be the bane of your existence when trying to relax in a quiet bubble bath. Seeing once-white grout with a tint of grey can turn relaxation into an all-consuming thought. To avoid this unsightly distraction while you’re trying to find your peace, we recommend using a toothbrush to scrub the grout. Before you scrub, though, pre-treat it with either dish soap or Kitchen and Bath CRL. CRL tends to require dwell time to activate it. The specific dwell time is indicated on the label of the product. Once it’s pretreated, scrub with your brush, and rinse with water.

    Items needed:

    • Toothbrush (unused…not your own toothbrush!)

    • Dish soap

    • Kitchen and Bath CLR

    • Water


    Hack: Light Fixtures and Vents

    We can sometimes forget about our lights and vents, particularly vents that are on the ceiling. From time to time, take the light cover off and remove any dead bugs and dirt that have landed there, then simply wash the fixture with dish soap and water. Dry it with a microfibre cloth and put it back. If you want to give your light fixture a little extra shine, we recommend polishing it with one of our glass cleaning cloths.

    For vents, if able, remove the vent and vacuum off any dust that became stuck in it. Once you’ve removed all dust particles (sometimes big clumps), wash with dish soap and water, dry with a microfiber cloth, and then put it back.

    Items needed:

    • Dish soap

    • Water

    • Vacuum

    • Microfibre cloth


     Hack: Baseboards Below

    Baseboards can collect dust and dirt, along with random bathroom splashes. Before you wipe them down, simply give them a quick vacuum to remove any dirt. If you don’t do this, then you’ll spread the dirt when wiping it “clean” with a cloth.

    Once you’ve vacuumed, wipe the baseboards down with a damp cloth. If they are dirty – simply use water and dish soap to remove any spots, then dry them with a dry microfibre cloth. Note that baseboards typically only need to be cleaned once per month.

    Items needed:

    • Vacuum (or duster)

    • Dish soap

    • Water

    • Two microfibre cloths


    Hack: Bathroom Door and Cabinet Fronts

    Much like other aspects of the bathroom, the door and cabinets tend to collect dust and grease build-up. While these don’t need to be cleaned every week, we do recommend once a month. All you need is a bit of dish soap in water on a microfibre cloth, then wipe down the door and cabinet fronts, removing any spots. Then, dry with another microfibre cloth.

    Items needed:

    • Dish soap

    • Water

    • Two microfibre cloths 

    The best way to mop your floors

     Hack: Floors that Shine

    Floors quickly become dirty from bath splashes, toilet splashes, sink splashes, all the splashes! To avoid having perpetually sticky, splashy floors, mopping the floor once a week with soap and water is your best bet. The best type of mop to use is one that you can attach a microfibre cloth to, not the type that you insert into a pail and strain the water out of the mop head.

    Note that different flooring materials can require different products. Depending on your bathroom floor, you may require different materials – which can be found in this post.

    Items needed:

    • Bucket of clean, hot water

    • Dish soap

    • Mop with velcro mop head

    • Microfibre cloth

    Bonus Hack: Counter Space and Storage

    There is nothing we love more than storage baskets under the sink. As much as having all our products out on the counter lets us know what we have, they add clutter and increase cleaning time because we have to remove all the products and then put them back when done. All you need to do is purchase a storage basket – the dollar store has excellent ones – put your items in the basket and hide the basket under the sink, pulling it out when you need it. This will help to keep your counters free of clutter.

    Items needed:

    • Storage basket

    These quick cleaning hacks for your bathroom will help to keep your bathroom a place for you to enjoy, not fear!


    If you’re looking for support in deep cleaning your bathroom so you can get started with your easy maintenance, simply connect with us for a quote to take care of the really tough scum.

  • 7 Ways to Professionally Clean Your House Like the Pros

    7 Ways to Professionally Clean Your House Like the Pros

    Disney’s Classic, Cinderella, gave us all certain expectations about how cleaning happens. It involves singing, friendly mice, and helpful birds. We’ve since learned that we were way off base.

     Not a single member of Clean Club Calgary has yet to see one mouse, one bird, one critter helps us with cleaning – even when we sing a lovely little song. Personally, we believe it’s because these creatures merely have a misunderstanding of what cleaning a house entails.

     So, if the neighbourhood chickadees aren’t yet sweeping your home, we thought it best to provide some insight into how we professionally clean a house just in case you need to clean…without the help that Cinderella had.


     1. Your Home; Your Cleaning Schedule

    Some families complete chores one day a week. Others, complete smaller chores each day. The best schedule for your home is the one that works best for you.

     What we do recommend at Clean Club Calgary is that if you have a busy household, tidy up every day or two so the build-up of “stuff” doesn’t start to overwhelm you. For example, do not leave dirty dishes and food on the kitchen counters, especially if you have pets. Pets will jump up with ease if there’s any hint of food on the counter. I personally have seen a dog eating a full birthday cake, knife and all, without even a second thought! Don’t worry, they survived.


    2. Bust the Bathroom Fear.

    Bathrooms are not as challenging as many of us think. It’s knowing what techniques and tools are available to you that make it easier. For instance, if you have hard water and glass shower doors (not the best combination if you ask me) make sure to take 10-seconds after each shower and squeegee the glass. This helps to reduce/prevent scum and hard water stains on the shower. Our personal method for cleaning this type of surface is starting at the top corner and working your way down to the bottom right. Go through and wipe down surfaces. If you stay on top of this, a scrub down of the surface will not be required each time you clean, but a simple wipe down. Another bathroom buster that reduces the heavy bathroom cleaning lifting is ensuring you clean your toilet the right way. Yes – there’s a right way! Here’s an article that gives you the step-by-step details to sparkling up that toilet (and freshening your whole bathroom) with ease!


    3. Let the Bedsheets Breath.

    Clean bedding should not be an afterthought when it comes to cleaning. There are often hidden, itty bitty dust mites, sweat, dead skin cells, hair, and fur (for pet families) and sometimes even bugs. A few things you can do to reduce these yucks are:

    1. Make your bed every day,

    2. Wash your bedding weekly and at least every second week.

    Super simple! This is the first place I typically recommend people start with cleaning their house. Once the bedsheets are changed, dusting will be a breeze  too, as you shook all the dust around and it can now be wiped with ease. 😊


    4. Kitchen Nightmares Become Dreams.

    Our kitchen can seem overwhelming to clean at first. There are all these corners, random spills and splotches, and food burnt onto the stove that seems to have made its home there. This nightmarish feeling doesn’t have to be. Begin building “every day tidying up” into your schedule (5-10 mins/day max). Since you clean or wipe down your kitchen after each meal, the more in-depth cleaning will be easier later. There are, of course, a few cleaning hacks we have to help along the way:

    1. Microfibre cloths are the best to wipe down surfaces, both when wet and dry.

    2. Soap and water are all you really need. Although, if you want a little extra kick, we recommend Bar Keeper’s Friend.

    3. Make your stainless steel appliances, glasses, and faucets sparkle with an amazing cleaning cloth.

    4. Remove pet and kid prints from cabinets with a damp, soapy microfiber cloth. Wipe down the cabinets with the damp cloth, then use a dry microfiber cloth to dry and polish up the cabinets again.


    5. A Dust is an Absolute Must!

    A quick once around the house with your dusting materials is all you need once a week. If you want to do a deeper dusting, we recommend dusting the baseboards and vacuuming the vents. Realize that dusting can also become quite cumbersome, particularly if you have lots of knick-knacks and other items that collect dust. However, dusting is one of the things that will immediately improve the air quality of your home, along with how “fresh” a space feels. To learn more about the ins and outs of how to properly dust, read this post on dusting tools and techniques .


    6. Vroom Vroom Vacuum.

    Our floors have so much more on them than we can ever imagine. Whether wood, cork, tile, or carpet, there’s dirt, dust mites, grit, and so many other hidden ickies that it’s best not to mention them further. Vacuuming is always required if you want a clean home. If you have pets, we recommend vacuuming a minimum of once a week. Every couple of months run the vacuum along the edges of your carpet as dust just loves it in these groves. And don’t forget under the bed! These areas are the biggest dust and dirt collectors. If you find yourself regularly waking up all stuffy and sneezy, ask yourself when the last time you vacuumed under the best was. To learn the ins and outs of vacuuming and on different floor types, read this post .


    7. Mopping the Good Ol’ Way.

    Mopping is not fancy. All it takes is a bucket of water with a mop and microfibre cloth. A good wash and wipe down of the floor is always the best. If you really want, you can add some essential oils to the soap and water to give a little extra zest to the smell. Start in one corner and work your way to the other. Take our advice though and be careful not to mop yourself into a corner where you can’t move until the floor is dry. It gets tricky trying to leap over the wet floor.


    With each of these steps for professional cleaning, we created this simple cleaning tool list, outlining the top 10 cleaning items you need to get your home all sparkly clean . Have these tools, follow the above insights, and your home will look as though the professional did it!

    Of course, there is an eighth way to clean your house, especially if the above simply leaves you saying, “no thank you!” Hire a professional cleaning company. We’d be happy to help 😉. Request a quote today.

  • How Often Should You Clean Your House?

    How Often Should You Clean Your House?

    If I had a nickel for every time I was asked, how often should I clean my house? I would have been able to retire a long time ago. I wouldn’t, because I love what I do, but I could. It’s that frequent of a question.

    In a study completed by the American Cleaning Institute, they found that the average American spends six hours cleaning every single week, with a third left wondering if they are cleaning enough or even correctly. After all, there is a proper way to scrub the toilet, remove dust bunnies, and vacuum the rug to ensure we’re not just moving, but actually removing dirt.

    Yet, how often you should you clean your house involves many factors, including how many people live there, if you have pets (particularly furry ones), your own preference and definition of what clean is, and so much more. Some may only require a monthly clean, some a biweekly, and still others weekly. The truth is, only you can decide how often you should clean your house.

    To help you determine your own frequency, whether monthly, biweekly, or weekly, here are some insights to support you in determining what’s right for you.


    1. Biweekly Cleaning

    The most common frequency requested at Clean Club Calgary is our biweekly house cleaning service. The reason is that a biweekly cleaning builds confidence in our clients that the main areas of their home are cleaned every two weeks. It’s a beautiful refresh that gives our clients time back in their weeks, so they don’t have to worry about scrubbing the toilet or scrapping food splatters off the stove’s backsplash. This has helped many of our customers take back their Saturdays to spend quality time with their families.


    2. Weekly Cleaning

    The next most common cleaning frequency requested by families is weekly. It provides assurance that the bathrooms, kitchen, and dusting are all being done, providing relief that the family can simply relax and be together during their downtime rather than worrying about what new dirt friend is growing in the kitchen corner. We also find that people who have furry pets – yes this can be your children – do best with a weekly cleaning so they can stay on top of all the additional fur, especially when it comes to the seasons changing. Sorry – we can’t do anything about your teenager’s mood swings though.


    3. Monthly Cleaning

    We often recommend monthly cleaning for those who live alone or a couple (without pets) who are generally fairly tidy. These are people who tend to want a deeper clean but won’t take too much additional time because they tidy and clean up after themselves during the month. They typically want to know that the cleaning they missed throughout the month is completed by us. It’s a true team effort!


    4. Cleaning Budgets

    While we would recommend weekly or biweekly cleaning for busy families and people who have pets, we do recognize that cleaning is a luxury item on a family’s budget, so we need to work with what they can afford. To learn more about the pricing involved and budget for different types and frequencies of cleaning, read this blog here all about how much to budget for a typical residential cleaning[1] .


    5. Cleaning Schedule

    When we say monthly cleaning, this doesn’t mean that the cleaning will fall on every 1st of the month or every 2nd Wednesday of the month for example. For cleaning companies to maximize their schedules, it is either weekly, every 2nd week or every 4th week.  It is extremely hard to offer regular cleanings every 3rd week. In fact, Clean Club Calgary doesn’t book tri-weekly cleans because these are too complex to accommodate our customers’ and our cleaning team members’ schedules.


    6. Deep Cleaning vs. Rotational Cleaning Services

    Monthly cleaning services typically require more deep cleaning and elbow grease because we’re removing a month’s worth of dirt/dust/etc. buildup. With weekly and biweekly cleanings, we’re able to rotate certain items (e.g., cleaning one room one week, another room the next, and so forth), so there is not as much buildup in between cleanings. This often comes down to the individual preference as to what type and how often the customer wants their space cleaned.


    7. Health & Cleaning

    Regardless of the frequency, there are items we clean each time to ensure the overall health of your family. This includes cleaning the bathroom (unless otherwise requested) and wiping down door handles, for example. The reason is that these items are often where germs remain and can directly impact the health of your family.


    At the end of the day, the type and frequency of cleaning comes down to personal preference and the budget available. If you are someone who prefers to have a superbly clean and tidy house and has the budget, then weekly cleaning is recommended. The ultimate goal is to provide a cleaning service that suits you and your needs.

    If you’re ready to take back your time and add regular cleaning to your household, then reach out to share which cleaning frequency best suits your needs. Simply connect here for a custom quote.

  • Love Your Renovation: Post-Construction Cleaning Tips

    Love Your Renovation: Post-Construction Cleaning Tips

    It’s that time of year – the time for renovations galore!

    Even more so this year as people use their travelling funds for home improvements as we continue through COVID adjustments.

    And with each of these renovations comes the dreaded renovation dust! Thick, sticky, heavy dust that lasts and lasts.

    The dust that renovation companies often promise to keep to a minimum. To contain. To try and control.

    The truth is – no renovation company can truly control the dust that comes with renovations. Yes – some things can be done to contain it. But, there will always be a need for a proper post-renovation deep clean. This helps to ensure the renovation experience won’t fall flat.

    So, what are some of the things to consider when looking for a renovation that ends in relaxation…not grumbles over dust floaties?


    man-and-woman-cleaning-after-renovations.jpg


    Minimal Dust is Still Dust

    There really should be three things in life that are guaranteed: DUST, death, and taxes. There’s no way around it. Dust will always be a part of your renovation.

    To support your overall renovation experience, ask what procedures the construction company has in place for keeping dust to a minimum (e.g.coverand protecting floors/windows, safely blocking vents, etc.). This will help contain the dust from flowing through to the rest of your house. The hazard here is if dust is not contained, it will require deeper cleaning beyond the room(s) where the renovation was completed. Ventilation systems carry this thick dust from room to room. If not accounted for, you could be looking at a hefty cleaning bill just to ensure all the dust is removed and your air quality is decent.

    Other items to inquire about are:

    • what type of cleaning post-renovation is included in the contracting company’s scope?

    • if cleaning is not included in the renovation scope, what is their solution for cleaning?

    • do they have a relationship with a cleaning company for this specific reason?

    Recognize that even if there is minimal dust that’s all contained, it will still be a frustration if it is not properly taken care of, taking away from the renovation itself.


    Renovations have Cleaning Stages

    One of the biggest misconceptions is that there are stages in renovation cleanings.

    Renovation dust takes time to settle. Even minimal dust.

    The clients we support with post renovation/construction cleaning (this includes our renovation partners who coordinate on behalf of their clients) are best supported in stages. An example of what this staged cleaning process looks like includes:

    1. Construction Clean. Here, most of the cleaning is done. This clean allows the trades to see what deficiencies there are to fix. (Oh yes – cleaning helps to identify where any knicks are, where things are misaligned, etc.). This clean also collects the majority of the renovation dust. Depending on the renovation itself, we may also complete the inside windows at this point, or leave it to the Final Clean.

    2. Final Clean. Here is when we come in and again vacuum and wipe everything down (once trades have finished all final touches). This removes any final dust that settled since the initial construction clean and is to be completed prior to occupation (if possible).


    Trade Tools Always Matter

    We can vacuum until we’re blue in the face, but if we don’t take care of that vacuum and change the bag, then we are merely spewing these heavy, sticky dust particles right back into the air.

    I’m not sure why renovation dust is unlike everyday dust, with its ability to linger long after it’s wanted, but it is. I do know that a simple wipe down is not going to cut it for post-construction cleans in getting rid of this dust. Neither will a simple rag.

    An invested post-renovation cleaning company will show up with the following each time:

    • A good vacuum that they know how to properly use. Learn more about this here. We highly recommend that the vacuum is HEPA-equipped for proper filtering of the dust particles.

    • A scraper. Even the best painters will always have a couple of spots that fly through the air. Our fresh eyes allow us to spot and then remove these mini splatters with ease.

    • Quality products. At Clean Club Calgary, we do not use a lot of harsh cleaning agents. Rather, we show up with our dish soap, Tide, Bar Keeper’s Friend, a bit of bleach, and a whole lot of elbow grease. These are the products that we find get the best results.

    • Brushes, dusters, and our microfiber cloths. These tools should be able to trap dust and fully remove it rather than merely pushing it around. To learn more about our favourite cleaning tools, click here.

    With the right tools (and the proper training), cleaning augments the home renovation, creating a positive overall experience for you, the homeowner! The ultimate reward? You get to simply enjoy the renovation…not any lingering dust.

    Right now, the construction industry is in full swing, working all hours to complete the projects so many Calgarians are investing in post-COVID. It’s important to work with a renovation company that understands the importance of the entire experience, beginning to end of a renovation. Someone who recognizes the need for a cleaning relationship that is high quality, can work with a flexible schedule, and collaborate with your construction crew for a coordinated clean.

    Remember, you’re renovating for a reason and I’m certain it’s not to sit in a pile of dust at the end of everything.

    If you’re in the middle of a renovation and are now thinking about a post-renovation clean, reach on out for a customized quote.

    If you are a renovation company yourself and are looking for a cleaning company to support you with this aspect of your customer experience, let’s connect for a deeper chat.

  • Cleaning Fun Facts and Surprise How To’s

    Cleaning Fun Facts and Surprise How To’s

    I love learning about cleaning. I love learning about the cleaning techniques, the science of cleaning, the business of cleaning, just about everything there is to do with cleaning, I love learning about it.

    One of my favourite ways to learn is from other cleaning companies and professionals. This is an industry where we truly love what we do. Where we feel honour and pride in what we do every single day.

     It’s this excitement that has helped me and the rest of the Clean Club Calgary team continue to evolve, grow, and provide better quality cleans. In this spirit, today we’re going to share a few of our team’s favourite cleaning tips and tricks that we’ve learned over the years.


    assortment-of-cleaning-products


    Clever Cleaning Products

    Cleaning products aren’t always great, which is why we tend to stick to mild soap, water, and bleach for the most part. However, there are some products that we love because of their versatility and effectiveness. Three include Bar Keeper’s Friend, Tide, and Easy Off.

    Bar Keeper’s Friend

    Website: www.barkeepersfriend.com

    This is a super versatile cleaning product, great for all kinds of scuffs and scruffs. You can use it on all types of surfaces, such as sinks, pots and pans (except non-stick), and bathtubs. Here are two fun clearing tricks to do with this product.

    1. Front-load washing machine. The door is meant to stay open after running a load to let it dry out. This doesn’t always happen, causing mold to build up. Simply run a cycle with a scoop of their cleanser and you’ll freshen your machine right up.

    2. Sneaker bottoms. Use a bit of Bar Keeper’s Friend to brighten up the bottoms and keep your sneaker bottoms scuff-free.

    Tide

    Website: tide.ca

    Great for laundry AND great for cleaning other household items.

    1. Baseboards and walls. Use a small scoop of Tide, mixed with warm water to wash down your baseboards and walls.

    2. Barbecue. It’s barbecue season right now so this a timely tip! Fill a bucket with warm water, add a bit of Tide, wipe down the barbecue. Easy.

    3. Sneakers. Want to get your whole sneaker clean and not just the bottoms? Then soak your sneakers in a bucket with Tide and Borat/Baking Soda. After soaking for an hour, remove and run through your washing machine. Wash with towels to keep the sneakers from bouncing around, helping to prolong the life of your washing machine.

    Easy Off

    Website:www.easyoff.us

    This may be a bit controversial as this Easy Off can be a bit harsh of a product and many homes do not want to use this product. However, we find that if the self-cleaning option on your oven doesn’t do a good enough job of cleaning the racks do the following:

    1. Pull the racks out and put them in a garbage bag.

    2. Spray inside the bag with Easy Off.

    3. Close the bag and leave for 1 hour.

    4. Take out racks and rinse off.

    You can also do this with your barbecue grills. Works like a charm…or a Clean Club Calgary team member!

    If Easy Off isn’t for you, not to worry. Do the following:

    1. Lay down an old towel in the bathtub.

    2. Put in the oven racks.

    3. Add 2 dishwasher pods with hot water and let soak overnight.

    4. Take out, rinse off, dry and put back. You may have to scrub the racks, but the overnight soak loosens the grime, making this easier.


    The Many Uses of Vinegar

    There’s a reason why vinegar disappeared off the shelves in March 2020 alongside toilet paper and all other cleaning products. It’s because this is one of the most versatile household items that almost every house has.

    Bathtub Jets

    Issue: cleaning out the jet spouts. This allows the inside of the jets to be cleaned, removing any mold, soap scum, etc. from the jets themselves.

    • Items needed: white vinegar, one dish pod tablet (e.g. Cascade)

    • What to do: fill the jet tub with hot water. Add one cup of vinegar and 1 dish pod. Let jets run for 30 minutes. Drain tub. Refill and relax with your freshly cleaned jets.

    Dishwasher

    Dishwashers often become scaled with lime. This lowers the power of the cleaning and removal of food bits.

    • Items needed: white vinegar

    • What to do: place one cup of vinegar in the dishwasher and run through a regular cycle. Do this once a month to maintain.

    Laundry Machine

    Whether top or front loading, all laundry machines need to be cleaned once every month or two. This helps keep your machine clean and your clothes super fresh.

    • Items needed: white vinegar, baking soda

    • What to do: combine 1 cup of baking soda and 1 cup of vinegar in your laundry machine. Run through a regular cycle. Once finished, open the door to let the machine air dry. Do not do this with clothes in the machine.

    Coffee Maker

    One of my personal favourite home appliances, the coffee maker often needs to be descaled of lime. This will help keep your coffee tasting delicious and perking you up the right way!

    • Items needed: white vinegar, glass cleaning cloth.

    • What to do: Add ½ cup of vinegar to a pot of water. Run the water/vinegar mix through the machine as you would if making a normal pot of coffee. Afterwards, rinse and dry. Make it sparkle and shine – a coffee pot fit for scrumptious coffee – with a glass cleaning cloth.


    woman-making-bed-with-fresh-sheets


    Pleasant Freshening Tips

    There are always forgotten items in the house when it comes to cleaning. Not to worry as we have fun tips to freshen a few of these often overlooked things.

    Pillows

    Pillows have so much hidden on them…even itty bitty mites. Washing pillows is a must – and you can use your washing machine more! Do it the right way, though, to keep your pillow nice and fluffy. Wash a minimum of two pillows at a time to keep the machine balanced. This also goes for dog beds (if they fit).

    Stuffed animals

    Did you know these can be washed? Trust us…you want to wash them if you haven’t yet. Just…trust us. Use the gentle cycle. If possible, place the plush friend in a laundry bag. You can find these in most dollar stores or in the laundry aisle at the grocery store.

    Feather Duvet

    To thoroughly clean this, they should be drycleaned. However, freshening up your duvet is one of the most beneficial things you can do for your sleep peace of mind. Put your duvet into the dryer. Add in dryer sheets and/or dryer balls. Run the heavy-duty program. This helps to kill any of those tiny mites who may have burrowed in somehow.

    Bedsheets

    I was born and raised in Hungary, where it is common practice to iron our bedsheets. To this day, when I am feeling low, overwhelmed, or just need a pick me up, I’ll iron my sheets before putting them on the bed. Crawling into a bed with freshly washed and ironed sheets is heavenly! There is nothing quite like it and I instantly relax and feel better. Ironing your sheets is essentially creating a fresh space for your mental health.

    Air vents

    Grime, dirt, hair, mud – so much gets caught in the air vents. Depending on just how dirty the air vents are, you can put them in the dishwasher, top shelf, and run them through for a turbo clean.


    Do you have a fun cleaning trick you’d like to share? Did you try one of the above? I’d love to hear all about it your experience and your own unique hacks. Connect with me here.

     Or – if you are really just looking for how to get someone to give you a quote so you don’t have to know these super fun tips, connect with me here. Happy to provide you with a quote that fits you!

  • The Materials You Need to Design an Easy to Clean Home

    The Materials You Need to Design an Easy to Clean Home

    Any designer or contractor worth their weight should be informing clients about material details and lifespan. I believe that we need to offer this information – it’s part of the service aspect that we do!

    – Jacqui Loucks, Jacqui Loucks Interior Design

    Last month, I had the opportunity to chat with my colleague Jacqui Loucks of Jacqui Loucks Interior Design about the larger considerations for interior design that is functional, aesthetic, and easily maintained. The only hiccup?

    She had SO MUCH AMAZING information to share, that I had to split her insights into two blogs! This month, we are going to dive a bit deeper into a few products and materials for interior design, helping you to make even more informed decisions when creating your dream space.

    I personally learned so much from Jacqui about the role an interior designer has in supporting their clients to create the functional home and aesthetic they want, and how it relates to their long-term lifestyle goals post-renovation. 

    As a professional cleaning company, and a self-proclaimed “cleaning enthusiast,” I was naturally drawn to her insights on materials and how to ensure clients are satisfied long after the interior work is completed. 


    Kitchen-with-white-cabinets-and-island-web.jpg


     Sparkling Surfaces and Counters

    As gorgeous as high sheen surfaces are (aka: shiny and reflective), they are not particularly easy to consistently return to their original glory.

    After all, there are some finishes that are much more forgiving than others and high sheen…well that is just angst waiting to happen. This comes down to knowing that not all high sheen materials are created equal. The following are Jacqui’s recommendations for consideration when looking at adding a high sheen surface to your home.

    Countertops: Countertops are hard-working task areas and the right performing materials must be considered for long term use.  Jacqui recommends natural granite or man-made composite stone surfaces  (e.g. caesarstone or equivalent) in a low-sheen finish. The density, or porosity, of these materials makes them less susceptible to nicks and scratches. The natural, organic patterns of granite are not only beautiful, but they help to conceal any mishaps that could occur over time. The composite products have anti-microbial properties that stop any bacteria or harmful germs from harbouring on the countertop surfaces.

    Cabinets: High sheen or glossy cabinets are a gorgeous aesthetic! The rub? They tend to act as reflective mirrors. This means that they must then be cleaned as such because they’re prone to fingerprints, dust, and sunlight. The best result for high-gloss cabinets is to specify an autobody paint finish, which increases the hardness and durability of the cabinet fronts.

    Jacqui shares, “if the client wants a high sheen look, we would definitely specify finishing the millwork with an autobody paint finish, as there is a better degree of hardness to keep it more scratch and fade resistant. What’s important to note is, they are NOT resistant to everything.”  Meaning, the high sheen may capture sunshine and reflect light more harshly at different times of the day. Most of the time, this can be managed with window treatments and/or dimmer switches. What I personally respect about Jacqui is that she feels that it’s crucial for interior designers to share this information with clients as it helps them understand how products perform once installed.

    Appliances: Stainless steel is truly one of my favourite looks when it comes to appliances. BUT, not all stainless steel is created equal. Therefore, not all stainless steel will be easy to clean…and our team knows this from cleaning A LOT of stainless steel. This comes down to understanding the gauge and finish of the steel. The best guidance here is to “test-drive” your options in the showroom before purchasing, and invest in the best quality stainless steel for your budget. This includes knowing what your budget can afford and what to expect of the products once they’re installed. 

    If you are not keen on stainless steel appliances, Jacqui loves – and often recommends – adding millwork panelling to fridges and dishwashers fronts, when possible. This not only offers a seamless and cohesive look to a kitchen, but you also won’t have to worry about fingerprints on stainless steel every time you use your fridge. Of course, while there are other material options to consider for appliances, stainless steel is one of that is most common ones we come across in our Clean Club Calgary clients’ homes.

    Sinks: Similar to appliances, I love a quality stainless steel sink. It is an excellent product that is anti-microbial and repels germs…Who wouldn’t love that?! Like stainless steel appliances though, there are different gauges and finishes based on the manufacturer, so it’s important to understand the best option and performance for your lifestyle and budget.

    All in all, if you love the look of high sheen surfaces, then you should have them and embrace them for all they do! Just know that they tend to have a bit more maintenance to them.


    Livingroom-with-wood-flooring-web.jpg


     Flooring for Your Feet and Vacuum

    Floors can be a professional cleaner’s best friend or our absolute worse nightmare depending on the type of material installed.   

    Selecting appropriate flooring materials is an important aspect to consider when renovating or building new. For instance, a hard, flat surface is typically easier to maintain than a material that is highly textured. There are several surface options in a variety of budgets to choose from to ensure you get the best floor for your needs. A few of the more common ones that we come across in our daily cleanings are:

    Natural stone tile: Limestone, granite or marble flooring is absolutely stunning to look at. To help maintain these surfaces, there are excellent sealants out there to protect them so you don’t have to worry (as much) about scratches or staining. However, even if they are sealed, absolutely NO HARSH CHEMICALS should be used on natural stone. Knowing this will save you from accidentally causing harm to your stone floor and impacting its lifespan and look. 

    Hardwood: As beautiful as dark, shiny hardwood floors are, they can be difficult to keep looking pristine, similar to high sheen cabinet surfaces. When selecting hardwood floors, consider a finish that has a low sheen finish and a wood species hardness rating that works best for your lifestyle. For instance, if you are an active family and/or have large pets, avoid softer wood species, such as walnut. Rather, opt for a harder wood, like hickory, oak or maple. 

    A low-sheen finish and lighter stain colours are typically better at concealing surface scratches and can give you some extra time by not needing to maintain a glossy shine by mopping every day.  Lately, many hardwood manufacturers are offering highly textured or distressed options for you to consider. The installed look of these is gorgeous, but it is important to know that the more distressed the flooring finishes are, the more opportunity there is for dirt to hide in, therefore requiring more elbow-grease with each cleaning.


    Bathroom-interior-with-white-tile-web.jpg


    Bathrooms with Grout, not Grit

    Next to the kitchen, bathrooms are the most used room in the house (…sometimes, they’re used a whole lot more!)

    When cleaning bathrooms, it is evident that not all tiles (and grout!) perform the same way.

    Below are some simple guidelines that Jacqui uses when selecting tiles for any bathroom project:

    • Large-format tiles are a favourite go-to size. Not only will this reduce the number of grout lines required, but this larger size also looks more luxurious and seamless. 

    • Avoid highly textured tiles where mould and mildew love to live when wet.

    • The choice of grout is just as important as the choice of tile. 

    Diving deeper into this topic, Jacqui let us know that not all grout will perform the same way. Spaces like bathrooms require a grout that has stain and humidity resistant capabilities (epoxy or high-performance grouts). 

    If a standard porous grout is used in a bathroom, it will hold onto moisture and be prone to mildew and mould. When cleaning, no matter how hard and how many times you scrub, this type of grout discolours in wet spaces. Also, if scrubbed too hard and too much, the likelihood of the grout breaking down increases, negating all effort you put into making your bathroom beautiful.

    Other recommendations and thoughts on bathroom maintenance:

    • Consider adding a water softener to help minimize hard water and mineral build-up on tile and glass within your shower and tub areas.

    • Know how often you are going to clean your bathroom as a once a week cleaning requires a different level of effort than every two weeks.

    • Smaller tiles add more texture and can add to your cleaning time.

    • Natural stone requires applications of sealant more often, making it a bigger commitment to maintain. There are many porcelain tiles that are as convincing as natural stone without the maintenance.

    The main takeaway that I took from Jacqui is that there are excellent choices for all your aesthetic goals to give you the best results that you’re looking for. Understanding how your materials need to be maintained and how they will perform once installed are the best questions to ask while you’re in the process of your renovation or build. An experienced interior designer and your general contractor would be the best resources for these answers.

    There is so much more to interior design than making a home aesthetically pleasing. A professional interior designer will create solutions to support a better function of your home while helping you understand the quality and performance of the materials being installed within your budget. This allows you to make better-informed decisions, giving give you more peace of mind that you are getting it right the first time.


    If you are ready to turn your home into the functional and beautiful space you want, connect with Jacqui to learn more about the details to get you there.

    If you are happy with your home and are ready to live in it without the stress of cleaning it, connect with me to see how Clean Club Calgary can clean for you!


  • How to Have Gorgeous Interior Design that Cleans with Ease

    How to Have Gorgeous Interior Design that Cleans with Ease

    The beauty of cleaning people’s homes? Seeing the creativity that went into designing it. 

    I love interior design. The concepts; flow; personality; and aesthetic. BUT every now and then, the Clean Club Calgary team comes across a gorgeously designed interior that is next to impossible to bring its original sparkle back.

    Confused about why something would be designed so beautifully, but so difficult to maintain, I connected with my colleague, Jacqui Loucks of Jacqui Loucks Interior Design, to get into the mind of a professional interior designer.

    The first thing Jacqui shared?

     “Great design must be able to function first. Interior design is always function first. Always.”

    Even the most well-designed home, if not easy to maintain, quickly loses its allure. 


    shower-with-glass-door.jpg


    Function First. Always!

    Just like cleaning, there is always a method to the madness. “Before we even start figuring out products, heights, colours, etc., we have to start at the MACRO level of the design’s purpose, and then move into the micro details from there,” Jacqui shares.

    This means digging in and understanding your lifestyle, your expectations for cleaning and maintaining your home’s design, and how you actually function within your home. In other words, will the new elements installed in your home cause you headaches, or improve your life as you move through your home?

    Consider this…if you are drawn to stonecast or granite composite sinks (lovely!), it’s not simply a matter of finding, and then installing, a stonecast sink. This type of sink is touted as having great durability. Its surface, however, is textured and pitted, making it harder to clean. It also tends to show water mineral stains – especially in hard water cities, such as Calgary. Knowing this, are you prepared for the effort and maintenance to keep the same awe and beauty you had, before first use?

    Should you still want that stonecast sink, Jacqui recommends two additional installs: install a water softening system and a pull-out spray nozzle on your kitchen tap for rinsing/eliminating particles after each use. There are also other excellent sink choices for high-task areas, such as the kitchen. Knowing your lifestyle helps the designer direct you to options that are the best fit for you.


    kitchen-with-white-marble-and-builtin-fridge.jpg


    Glass Can Be Our Friend!     

    It’s no surprise that I love seeing glass spotlessly sparkle and mirrors magnificently reflect. This is something I take pride in and have invested in products for my team’s use. We love adding sparkle back into our clients’ lives.

    Yet, untreated glass or anything with a high sheen surface – such as stainless steel or glossy cabinet doors – can quickly become a source of frustration. When function, maintenance, and long-term expectations are not discussed prior to ordering and installing the products, there can be regret knowing that there were better options.

    Passionate about this very thing, Jacqui states, “As designers – we MUST address what to expect when it comes to the later maintenance of the products installed POST construction…This comes down to understanding what materials and finishes would be best suited for the occupants using the space.”

    So, what can you do if you love the spotless glass look but hate the smudged glass look?

    “There is tempered glass that has these sealants and applications. These sealants, however, must be applied at the factory prior to the installation,” shares Jacqui.

    The applications, known specifically as hydrophobic or oleophobic sealants, help limit fingerprints, smudges, and watermarks. Knowing that there’s an option for this BEFORE shower glass walls or glass railings are installed, the client can make more informed decisions about products that can significantly reduce the upkeep or maintenance when they are consistently used daily.


    stairway-with-glass-sides-beautiful-chandelier.jpg


    Design Today for Tomorrow’s Expectations

    An interior designer like Jacqui ultimately saves you time, creates functional design solutions (that you likely didn’t even know existed!), and will recommend beautiful finishes within your budget to receive that gorgeous house you’re so proud of. The up-front planning and decisions made within the design process are critical paths for the best outcomes when renovating or building new.

    Understanding your long-term commitment to maintaining the design, helps you receive the right product or material choice for your budget. This allows for better expectations for what to invest in cleaning – either in personal energy and time or budgeting for a residential cleaner.

    An interior designer should be there to support you in creating the home you want for the budget you have. This also means aligning with the right contractors who have the experience and knowledge to correctly build and install the intention of the design while engaging you in the decision-making process. An interior designer’s role is not only to project manage these details for a beautiful outcome; it is to present the best products, materials, and design decisions that reflect your priorities, lifestyle, and budgets.

    There is so much more to interior design than what most people think. As Jacqui stated, good interior design should always prioritize function first. Then when combined with a commitment to maintaining the beauty and the function, your house will become – and stay – the home of your dreams.

    If you are beginning your interior design journey, I highly recommend connecting with Jacqui to make it that much easier. Start a conversation on what to consider over and above the look. Send her a message right here.

    If you’ve already designed the functional home of your dreams and require support to make it sparkle again, message me for a quote! Cleaning is one of my favourite topics!

  • How to properly kill all dust bunnies invading your home

    How to properly kill all dust bunnies invading your home

    You would think that scrubbing grime from toilets would be a cleaner’s least favourite job. But, I’m here to tell you that in reality, it’s dusting.

    Dust – our sworn enemy. Our never-ending foe. Every time we think we’re finished, there’s always more. It’s so seemingly simple to remove…but the truth is giving a quick wipe down does not, in fact, provide a quality dust nor clean. Now that you’ve got me started on this topic, we’re going to dive even further into the hidden world of dusting. 


    red-cloth-dusting-blinds


    DUST: YOUR HOUSEHOLD PET “BUNNY”…OR ENEMY?

    Be aware – knowing what is dust, is not for the faint of heart. Yes, dust is dirt. But, it is also a mixture of sloughed-off human skin cells (and animals if those are in your home), hair, bacteria, dust mites and their feces, teeny bits of dead bugs, soil particles, pollen, clothing fibre, and even microscopic specks of plastic.

    It gets worse. All of these organic items attract a number of the pollutants and chemicals we use in our homes. So, in addition to the soil from our shoes, we also have a concoction of pollutants, metals, chemicals and more…all adorably called a “dust bunny.”

    Calling it a bunny does not make it any cuter, nor something to keep as a pet. The only way to get rid of the microscopic grub is to grab your microfiber cloth and vacuum and dust.


    dusting-granite-surface-with-microfibre-cloth


    HOW TO ACTUALLY DUST YOUR HOME

    As much as they accompany the Halloween “maid” costume, feather dusters do not work. They merely stir up the dust, allowing all those microscopic organisms to settle back onto furniture and other objects in the room.

    Now that’s out of the way, let’s continue, shall we?

    1. Dust top to bottom

    Start at the top and work your way down. First, dust your ceiling fans and vents, working your way down to furniture tops, bookshelves (including the items on these), and furnishings.  Finally, end with the floor.

    Top to bottom dusting tip:  if you have a lot of dust and pet hair already on the floor, I recommend doing a quick vacuum to start.

    2. Dusting standing furniture

    Use a damp cloth soaked in water with a bit of dish soap. This will remove any contaminants over and above the dust. For Clean Club Calgary’s dusting protocol, we make sure to remove all trinkets from the furniture prior to starting. We then wipe both the shelf and the individual items separately. After everything is free of dust, we put them back right where they belong!

    Furniture dusting tip: do not forget to dust the top of cabinets and other shelving units. Dust LOVES to hide up there.

    3. Dusting upholstered furniture

    Beneath every soft, cushiony surface lies those dust mites and lint collectors. While it is recommended to have your upholstery cleaned once or twice a year, the easiest way to maintain a dust-free couch is by washing it with a damp microfiber cloth. This is for either fabric or leather furniture. However, with leather furniture, be sure to apply a specific leather protector solution a couple of times of a year to keep it from drying out.

    Upholstery dusting tip: use the furniture tool that came with your vacuum to get in the nooks and crannies of the sofa and other seating surfaces.

    4. Dusting electrical appliances

    I know – you wipe the dust off your screen and it’s almost as though it never happened. So frustrating!

    To have a slightly longer dust-free screen – from your television to your laptop – wipe your screen with a good quality, slightly damp microfiber cloth. Afterwards, wipe down with a dry microfiber cloth to polish the surface up. Check out our own personal favourite cloth for polishing up screens, mirrors, and glass surfaces.

    For items such as keyboards, you can remove dust by using a can of compressed air. The same can be done for remote controls (including game controllers) where itty pieces of dust particles get stuck within the keys. 

    Electrical dusting tip: tell your professional cleaners what should not be unplugged. It is our job to ensure we always dust 100% and part of this is unplugging all items to clean around them. If you have modems, alarms, or other crucial items that must remain plugged in, always include this direction for your cleaners. 

    5. Dusting houseplants

    Dust traps. Extremely large dust traps. That is what houseplants are. And, they are inefficient to dust.

    For live plants, the most effective way to dust them is to put them in the tub and bathe them, gently removing dust and grime from their leaves. In the summertime, take them outside and wash them down.

    If you have fake plants – these are even worse dust collectors. The best way to remove the dust? Take them down once a year and soak them in warm water with a bit of dish soap. When done, lay them down on old towels to dry.

    Houseplant dusting tip: If you choose to wipe the leaves of your plants, DO NOT use a cloth containing a chemical cleaner when wiping down live plants. This will kill them.

    6. Dusting the floor

    Last, but not least, we come to dusting the floor. This is best completed by vacuuming. If able, pull beds, cabinets, and other furniture away from the wall so you can access the hair and other dust clumps hiding underneath. For uncarpeted floors, once vacuumed, wash the floor. The type of product to use depends on the floor material itself. However, when in doubt, use warm water with a small amount of gentle dish soap.

    Floor dusting tip: Every three months sprinkle your carpet with baking soda. Let it stand for 2 hours, and then vacuum. This helps to kill dust mites hiding in the carpet threads.


    microfiber-cloth-cleaning-electronic-items


    DUSTING IS A HEALTH MATTER

    Knowing what is in dust, it’s no wonder why it makes us sneeze, cough, have our eyes water, and so much more. This is why dusting is crucial to every single cleaning job.

    Dusting is a key element for ensuring a true quality clean.

    • Frequency matters

      Not all homes need to dust the same amount. That said, a good rule of thumb is to dust once a week. However, if you have allergies, live with pets, tend to track a lot of outdoors inside, and so on, you may need to up your frequency.

    • Vacuum type

      I’ve said it before and I’ll say it again: a central vacuum is the best vacuum AND the most effective way to remove dust. The suction power on a central vac is typically 70 – 100% higher than that of handhelds, ensuring that it removes dust mites and feces responsible for allergies. Of course, not all homes come with central vacuums. To learn how to vacuum so it doesn’t have to suck, visit our blog on vacuuming.

    • Dust cloth material

      As I said above – DO NOT use a feather duster. Rather, the best type of material to dust with is either a microfiber dusting cloth OR a non-synthetic dusting cloth. If using the non-synthetic cloth, you may have to soak this in water with a dab of dish soap and then ring it out prior to using it.


    The thing about dusting is that, no matter what, it will always be a cleaning chore to be done. The best we can do today is know how to properly dust in a way that minimizes its impact on our individual health and make peace with our “house bunnies.” After all, they’ll be removed once a week!

    Want some help staying on top of your dusting? Contact us for a quote today!

  • Cleaning Supplies that Bring the Shine in 2020 and Beyond

    Cleaning Supplies that Bring the Shine in 2020 and Beyond

    “Clean” and “detailed” are not words my family uses to describe me as a child.

    Dirty, playful, tomboy, even a corner cutter when it came to doing the dishes. I mean, who had time to wash the back of the plate, anyway? There was playing that had to be done!

    So how did I, a disorganized child from Hungary, come to appreciate and even start my own professional cleaning company in Calgary?

    One person…my mother.

    My mom continually highlighted the importance of the details in cleaning. The desire to take pride in my chores and think methodically about how to clean rather than merely “tackling it.” She was a stickler for doing a job right. She still is to this day in her own barbershop. And her house…it’s immaculate!

    And this eventually was passed onto me; the desire to see a job through to completion with a focus on the details for the added sparkle.

    I would even go so far as to say that my mother is proud of how her consistency for details rubbed off on me. That, and her own business acumen having run her own business. She is a huge reason why I started Clean Club Calgary. And an even bigger reason as to why we take such pride in our work.

    Even more so today since she discovered the original cleaning tool that we still use today on every single cleaning project we do.


    THE CLOTH THAT BROUGHT MORE SHINE TO BUSINESS

    Fast forward a few years and many hours of detailed cleaning later, I was running my own cleaning business when my mom found the absolute perfect cloth. This cloth did EVERYTHING I needed it too – especially when it came to the extra quality cleaning details that my mom would approve of. 

    This cloth created the sparkle that my mother taught me to strive for in everything I do – including cleaning the back of the dirty dish.

    Initially, I purchased these cloths from Canadian Tire until one day in 2019…they stopped carrying them.

    I was SHOCKED, thankful that we had an extra supply to use, but worried about what would happen when we used them all.

    Not to mention, my team was worried! They loved this cloth. In fact, it was their most-used cleaning tool that allowed them to see the impact they have on our clients! This cloth was a team member in and of itself as it allowed us to:

    • Easily clean across multiple surfaces from stainless steel and glass to cars and grease removal

    • Add some extra sparkle by using it with damp soapy water, where many other comparable cloths do not, and

    • Leave post-renovation and construction sites with a SHINE that highlighted the reno work, not leftover reno dust.

    It came down to knowing that, while we are excellent and industry-trained professional cleaners, we are also only as good as our tools. And this cloth was the tool that helped to make us great.

    My first thought about sourcing a new cleaning cloth? “WHAT AM I GOING TO DO NOW?! This is the tool we love to use as it’s the perfect all-purpose cloth that is actually affordable!”


    Dishwasher Shine - IG.jpg


    FINDING THE CLEANING CLOTH THAT REALLY SPARKLES

    I did what any business owner would do – I figured it out.

    Long story short, I sourced the original distributor of the cloth as the product itself was not discontinued. What we also discovered as we shared this “upset” with our customers is that they also wanted cloths for themselves. Something to clean their glasses or polish up their mirrors in between cleanings. So, I decided to make them available for customers and individuals who are looking to keep the sparkle in their daily lives.

    It may seem small, but I get really excited when I finish cleaning with this cloth. Suddenly, everything sparkles. This tiny ability and extra step to add a bit more shine to homes and offices is something I can do for others. Add a bit of sparkle back for a moment of satisfaction.

    It’s funny how consistent lessons from our childhood can guide our passions in life. That and a patient parent. My mother and her insistence on quality details no matter what I was doing is the reason I’m able to help others add more sparkle to their lives. And that is no small feat in today’s world.

    Now you know. Even the dirtiest of tomboys can become a huge advocate for cleaning and passionate about a cloth! Curious about how Clean Club Calgary can provide a quality clean that brings sparkle to your life? Connect today for a chat!

    Looking for the cloth of your own that keeps your space shiny? Purchase your own here: https://www.cleanclubcalgary.com/products